
 pin it
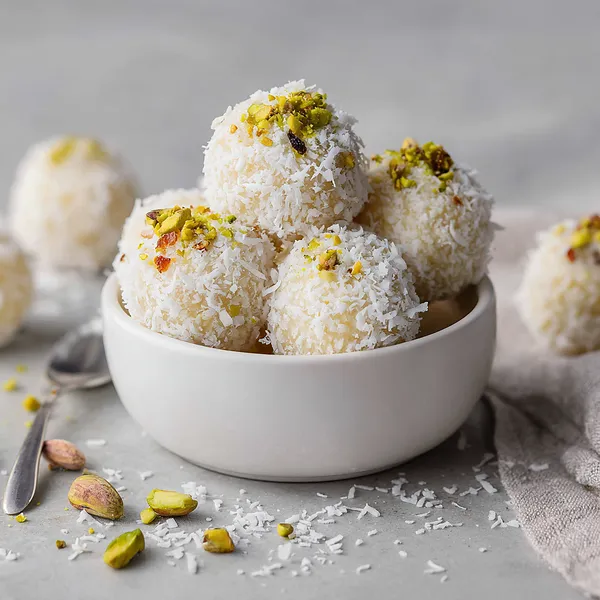
I'll never forget the first time I tried a White Christmas truffle at my Australian friend's holiday party years ago. I was expecting just another coconut candy, but when I bit into it, I was blown away by the explosion of textures and flavors – the creamy white chocolate base, the chewy sweet fruits, the crunchy pistachios, all wrapped in that delicate coconut coating. It was like a party in my mouth! I immediately asked for the recipe, and she laughed, telling me it was one of the easiest desserts she knew. I've been making these every December since then, and they've become my signature holiday treat. What I love most is how forgiving this recipe is – you can adjust the fruits and nuts based on what you have or what you prefer. The key is using good quality white chocolate and not skimping on the condensed milk, which gives them that perfect creamy texture. Rolling them in coconut is therapeutic, and watching them transform into perfect little snowballs never gets old.
Why I love this recipe
This recipe holds a special place in my heart because it represents everything I love about holiday baking without the stress. There's no precise temperature to worry about, no timing that has to be perfect, no risk of burning anything. It's pure creative fun! I love that I can make these with my kids without worrying about hot ovens or complicated techniques. The ingredient list is simple, and you probably have most of it in your pantry already. What really gets me is how professional they look – guests always assume I spent hours making them, and I just smile and accept the compliments. They're also incredibly versatile; I've made them with dark chocolate, added orange zest, used different nuts, and they always turn out amazing. Plus, they keep beautifully in the fridge, so I can make them days ahead of any event. The nostalgia factor is huge too – one bite transports me back to childhood Christmases and creates new memories with my own family.
What You Need From Your Kitchen
- White chocolate chips: Melt with condensed milk and butter to create the creamy truffle base
- Sweetened condensed milk: Mix into melted chocolate for smooth, creamy texture
- Shredded coconut: Divide between mixing into the truffle base and coating the finished balls
- Dried cranberries or candied cherries: Chop and fold into the mixture for festive color and chewy texture
- Pistachios: Chop finely and mix throughout for nutty crunch
- Sultanas or golden raisins: Add to the mixture for natural sweetness and texture
Let's Make These Together
- Melt the chocolate base
- Start by combining your white chocolate chips, sweetened condensed milk, and butter in a saucepan over low heat. Keep stirring constantly to prevent burning – you want everything to melt together into a smooth, glossy mixture. Once it's completely melted and silky, remove from heat and add your vanilla extract for that extra layer of flavor.
- Mix in the festive goodies
- Now comes the fun part! Fold in half of your shredded coconut along with all your chopped fruits and nuts. Make sure everything is evenly distributed so each truffle gets a good mix of all the delicious ingredients. The mixture will be thick and studded with colorful bits.
- Chill until firm
- Cover your mixture and pop it in the fridge for an hour or two. You want it firm enough to roll without sticking to your hands, but not rock hard. This is a great time to clean up and get your coating station ready.
- Roll and coat
- Once chilled, use a small scoop to portion out the mixture and roll it into balls with your hands. Work quickly because the warmth of your hands will soften it. Then roll each ball in the remaining coconut, making sure it's completely covered in that snowy coating.
- Final chill and serve
- Place your coconut-coated truffles on a parchment-lined tray and refrigerate for at least 30 minutes to set completely. This final chill ensures they hold their shape perfectly and have the best texture. Once set, they're ready to enjoy or gift!
 pin it
Switch Things Up
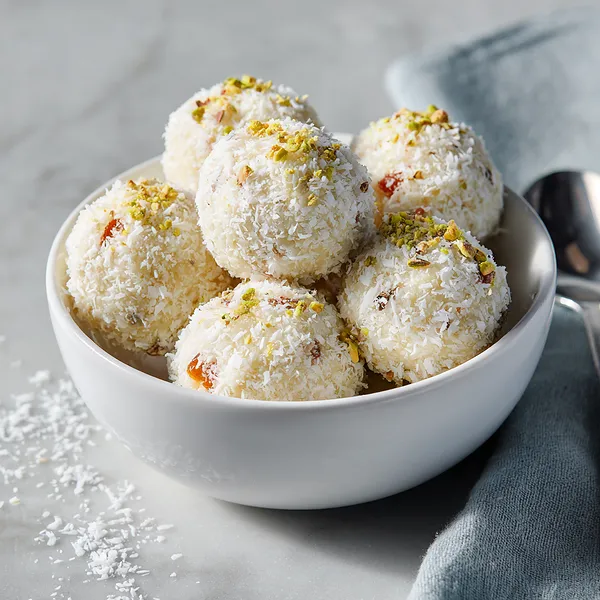
I first made these truffles when I needed a last-minute dessert for a holiday potluck and didn't want to spend hours in the kitchen. I was amazed at how quickly they came together – literally just melting chocolate, stirring in goodies, and rolling into balls. The hardest part was waiting for them to chill! My kids went absolutely crazy for them, fighting over who got the ones with the most cherries. Now they've become our annual tradition. I love experimenting with different dried fruits – apricots and cranberries work beautifully. Sometimes I'll add a splash of rum extract for an adult version. The best part is making them with my family, everyone gets messy hands covered in coconut, and we laugh the whole time. These truffles never last more than a day in our house!
Perfect Pairings
These White Christmas Truffles pair wonderfully with hot beverages – try them with spiced chai tea, peppermint hot chocolate, or a strong espresso to balance their sweetness. They also complement other holiday desserts beautifully on a dessert platter alongside gingerbread cookies, chocolate fudge, or peppermint bark. For an elegant touch, serve them with champagne or dessert wine at holiday parties. They're also fantastic crumbled over vanilla ice cream or used as a topping for festive trifles.
 pin it
Frequently Asked Questions
- → Can I use milk chocolate instead of white chocolate?
While you can technically use milk chocolate, these are traditionally made with white chocolate to achieve the classic "White Christmas" appearance and flavor. Milk or dark chocolate would change the flavor profile significantly and result in a different treat altogether.
- → How long do these truffles last?
Stored in an airtight container in the refrigerator, these truffles will keep fresh for up to 2 weeks. You can also freeze them for up to 3 months – just layer them between parchment paper in a freezer-safe container.
- → Can I make these ahead for holiday gifts?
Absolutely! These are perfect for making ahead. Prepare them up to a week before you need them and store in the fridge. For gifting, place them in decorative boxes or tins lined with parchment paper. They transport well and don't require special handling.
- → What if my mixture is too sticky to roll?
If your mixture is too sticky, it likely needs more chilling time. Return it to the refrigerator for another 30 minutes. You can also lightly coat your hands with coconut oil or dust them with powdered sugar while rolling to prevent sticking.
- → Can I customize the fruits and nuts?
Yes! This recipe is very flexible. Try dried apricots, candied ginger, chopped dates, almonds, macadamia nuts, or pecans. Just keep the total amount of add-ins about the same – roughly 1.5 cups total of fruits and nuts combined.
- → Do I need to use sweetened or unsweetened coconut?
Use sweetened shredded coconut for traditional flavor. Unsweetened coconut can be used if you prefer less sweetness, but the truffles won't be as authentic to the classic White Christmas treat. Make sure to use shredded, not flaked coconut for best coating.
Conclusion
These White Christmas Truffles are the ultimate holiday treat that combines nostalgia with ease. They're perfect for gift-giving, cookie exchanges, or simply enjoying with family during the festive season. The combination of creamy white chocolate, chewy dried fruits, and crunchy nuts all wrapped in a coconut snowball is irresistible. Make them ahead and store in the fridge for up to two weeks, or freeze for longer storage. Each bite brings festive cheer!