
 pin it
I'll never forget my first encounter with real roasted garlic aioli at a small bistro in the Mediterranean. The chef brought out a bowl of this golden, creamy sauce alongside a platter of grilled vegetables, and from the first bite, I was completely hooked. The garlic wasn't harsh or overpowering – it was sweet, mellow, and perfectly balanced with the richness of the emulsified oil and egg yolks. I spent the rest of that trip trying to recreate it in my mind, scribbling notes about the texture and flavor. When I finally got home, I experimented for weeks until I nailed the perfect ratio of roasted garlic to oil, the ideal amount of lemon juice for brightness, and that silky-smooth consistency that makes it cling to everything perfectly. This recipe is the result of all that experimentation, and I'm so proud of how it captures that same magical experience I had in that little bistro. Every time I make it, I'm transported back to that sunny afternoon, and I hope it brings you the same joy it brings me.
Why I love this recipe
What I absolutely love about this roasted garlic aioli is how it transforms the ordinary into the extraordinary with minimal effort. Roasting the garlic mellows its sharpness and brings out this incredible caramelized sweetness that you just can't achieve with raw garlic. The process of emulsifying the oil into the egg yolks is almost meditative – watching the mixture transform from separate ingredients into a thick, glossy sauce is pure kitchen magic. I love that it's made with simple, whole ingredients that I can pronounce and understand, unlike store-bought versions packed with preservatives. The versatility is another huge plus; I've used it as a pasta sauce base, a pizza spread, a marinade component, and even stirred into mashed potatoes. But most of all, I love how this recipe makes me look like a culinary genius when I serve it to guests. People always ask for the recipe, amazed that something so delicious could be homemade. It's become my secret weapon in the kitchen, and I make it at least twice a month because my family goes through it so quickly.
What You Need From Your Kitchen
- Garlic bulb: Roast whole until caramelized and sweet, then squeeze out soft cloves
- Egg yolks: Bring to room temperature before using for smooth emulsification
- Neutral oil: Use vegetable or canola oil as the base for a mild flavor
- Olive oil: Add extra virgin for rich, authentic Mediterranean taste
- Lemon juice: Freshly squeezed for brightness and acidity balance
- Dijon mustard: Helps with emulsification and adds subtle tang
Let's Make These Together
- Roast the garlic perfectly
- Preheat your oven to 400°F and prepare the garlic bulb by slicing off the top to expose all the cloves. Drizzle with olive oil, wrap tightly in foil, and roast for 35-40 minutes. The cloves should be soft, golden, and smell absolutely incredible. Let them cool before squeezing out the sweet, caramelized flesh.
- Create the emulsion base
- Place your room temperature egg yolks in the food processor along with the roasted garlic, mustard, lemon juice, and salt. Blend everything together for about 30 seconds until you have a smooth, golden mixture. This is your flavor foundation.
- Slowly incorporate the oils
- With the processor running on low, begin drizzling in the neutral oil drop by drop at first. This is the most critical step – patience here ensures a silky, stable emulsion. As the mixture thickens, you can add the oil in a slightly faster stream. Finish with the olive oil for that authentic Mediterranean flavor.
- Perfect the texture and flavor
- Once all the oil is incorporated, blend for an additional 10-15 seconds to achieve that glossy, thick texture. Taste and adjust seasoning with more salt or lemon juice as needed. The aioli should be thick enough to hold its shape but still smooth and creamy.
- Chill and serve
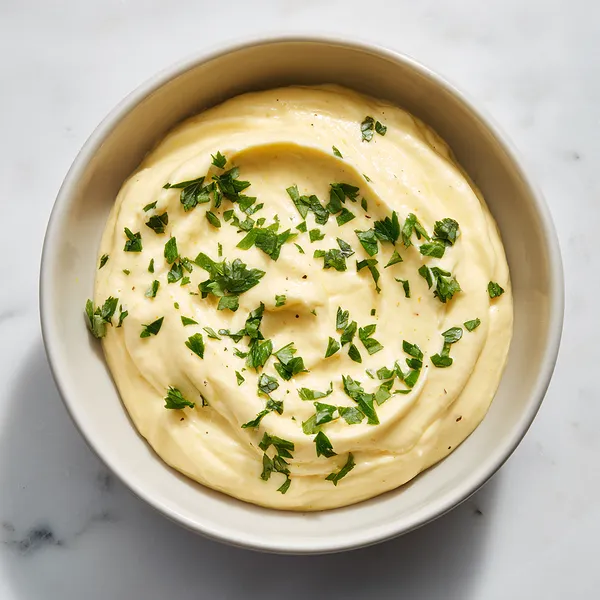
- Transfer your beautiful aioli to a clean container and refrigerate for at least 30 minutes. This resting time allows all the flavors to marry together beautifully. Before serving, give it a quick stir and garnish with fresh chopped parsley for a pop of color.
 pin it
Switch Things Up
I first made this roasted garlic aioli on a rainy Saturday afternoon when I was craving something special to go with my homemade sweet potato fries. I had a bulb of garlic sitting on the counter, and inspiration struck. As the garlic roasted in the oven, my kitchen filled with the most incredible aroma – warm, sweet, and completely intoxicating. When I finally blended everything together, I couldn't believe how restaurant-quality it turned out. My partner came into the kitchen, took one taste, and declared it the best thing I'd ever made. Now, I make a double batch every week because we literally put it on everything – burgers, roasted vegetables, grilled chicken, even as a spread on crusty bread. The best part? My friends now request that I bring "that garlic sauce" to every potluck. It's become my signature dish, and I love how such simple ingredients can create something so extraordinarily delicious.
Perfect Pairings
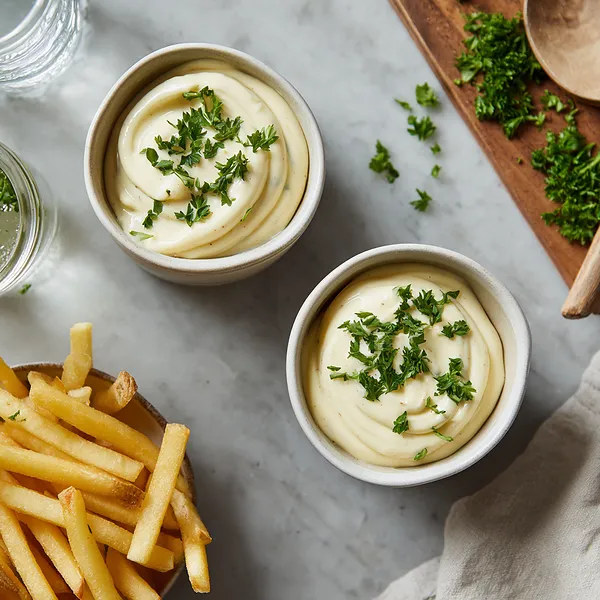
This roasted garlic aioli is incredibly versatile and pairs beautifully with so many dishes. Serve it alongside crispy french fries, sweet potato wedges, or onion rings for the ultimate dipping experience. It's phenomenal spread on burgers, sandwiches, or wraps, adding instant gourmet flavor. Try it as a topping for grilled steak, chicken, or fish – the creamy garlic complement is perfection. It also makes an excellent dip for fresh vegetables, crusty bread, or as a sauce for grain bowls. For a Mediterranean feast, serve it with falafel, grilled halloumi, or roasted eggplant.
 pin it
Frequently Asked Questions
- → Why did my aioli break or separate?
Aioli breaks when the oil is added too quickly or when the eggs are too cold. The emulsion needs time to form properly. To fix broken aioli, start with a fresh egg yolk in a clean bowl and slowly whisk the broken mixture back in, drop by drop, until it re-emulsifies.
- → Can I make this without a food processor?
Absolutely! You can make aioli by hand using a whisk and bowl, though it requires more arm strength and patience. An immersion blender also works wonderfully – just blend in a tall, narrow container for best results.
- → How long does homemade aioli last?
Properly stored in an airtight container in the refrigerator, homemade aioli will keep for up to one week. The garlic flavor will intensify over time, so if you prefer a milder taste, use it within the first few days.
- → Can I use raw garlic instead of roasted?
Yes, but the flavor will be much sharper and more pungent. Roasting the garlic creates a sweet, mellow flavor that's less harsh. If using raw garlic, start with just one or two cloves and adjust to taste.
- → Is it safe to eat raw egg yolks?
There is a small risk with consuming raw eggs. To minimize risk, use pasteurized eggs or egg yolks, which are available at most grocery stores. Pregnant women, young children, elderly individuals, and those with compromised immune systems should avoid raw eggs.
- → Can I make this dairy-free and vegan?
Yes! Replace the egg yolks with aquafaba (chickpea liquid) – use 3 tablespoons of aquafaba in place of the egg yolks. The emulsification process works similarly, creating a creamy, delicious vegan aioli.
Conclusion
This roasted garlic aioli is more than just a condiment – it's a flavor revolution in a bowl. The slow-roasted garlic brings a mellow sweetness that perfectly complements the rich, creamy base, while the bright lemon juice cuts through with just the right amount of tang. Whether you're spreading it on sandwiches, serving it alongside grilled vegetables, or using it as a dip for your favorite fries, this aioli elevates everything it touches. Store it in an airtight container in the refrigerator for up to one week, and watch as it becomes your new go-to sauce for absolutely everything.