
 pin it
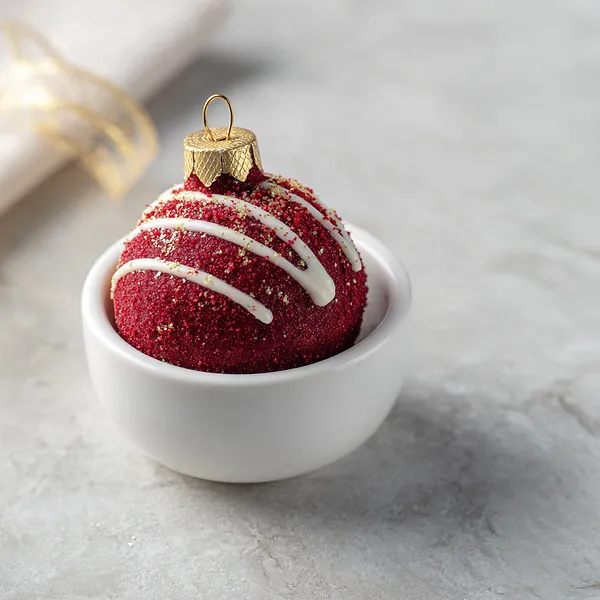
I'll never forget the first time I saw cake ball ornaments at a holiday boutique – they were priced at five dollars each, and I thought, "I could make these!" That weekend, I dove into experimenting, and what emerged from my kitchen was pure magic. This recipe transforms simple red velvet cake into edible Christmas ornaments that are almost too pretty to eat. The process is surprisingly therapeutic: you crumble the cake, mix it with cream cheese frosting until it's like cookie dough, then roll perfect spheres with your hands. The real fun begins with the decorating – melting candy melts in festive colors, dipping each ball carefully, then letting your creativity flow with icing designs. I love using a piping bag to create delicate snowflakes, elegant swirls, or playful polka dots. The golden donut hole "caps" are genius – they add height and make these look authentically like ornaments. What makes this recipe special is how it combines the beloved flavor of red velvet cake with the whimsy of holiday decorating. When you bite into one, you get that classic red velvet taste with cream cheese tang, all wrapped in a sweet candy shell. They're fancy enough for gifting but fun enough to make with kids.
Why I love this recipe
This recipe holds a special place in my heart because it perfectly captures the spirit of holiday baking – it's creative, beautiful, and absolutely delicious. I love that it takes a classic dessert (red velvet cake) and transforms it into something unexpected and festive. There's something incredibly satisfying about rolling these perfect spheres and watching them transform into miniature works of art. What really makes me appreciate this recipe is its versatility – you can customize the colors and decorations to match any holiday theme or even make them for other celebrations. I also love that they're make-ahead friendly; you can prepare them days in advance, which is a lifesaver during the busy holiday season. The reaction they get is priceless – people always think they're store-bought from an expensive bakery, and revealing that you made them yourself feels amazing. Beyond the wow factor, they genuinely taste incredible. The texture is perfect – soft and moist from the cream cheese frosting binding, with just the right amount of sweetness from the candy coating. They're also portion-controlled, so you can enjoy a festive treat without overindulging. Every time I make these, I feel like I'm creating edible gifts that spread joy.
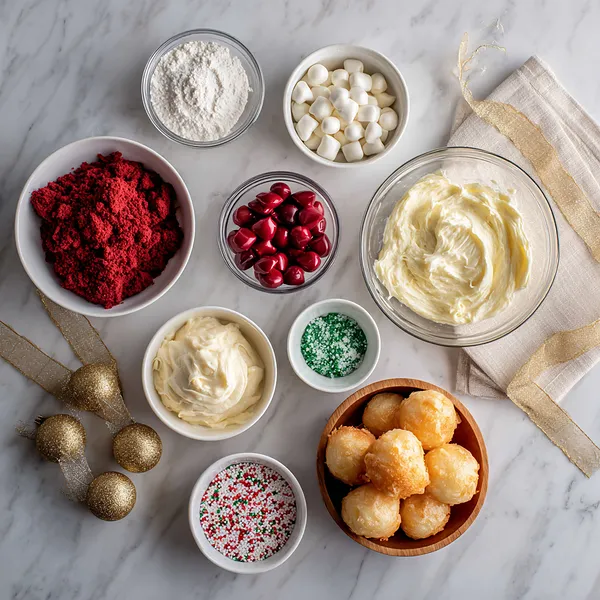
What You Need From Your Kitchen
- Red Velvet Cake Mix: Bake according to package directions and allow to cool completely before crumbling
- Cream Cheese Frosting: Mix thoroughly with cake crumbs to create the binding mixture
- Candy Melts: Melt separately in microwave-safe bowls, stirring every 30 seconds until smooth
- Mini Glazed Donuts: Spray with gold edible coloring to create ornament caps
- White Icing: Use in piping bag to create decorative designs on coated ornaments
- Gold Edible Glitter: Apply to donut holes for festive ornament cap appearance
Let's Make These Together
- Bake and Prepare Cake
- Start by baking your red velvet cake according to the package instructions in a 9x13 inch pan. This usually takes about 25-30 minutes at 350°F. Once baked, let the cake cool completely on a wire rack – this is crucial because warm cake will make your mixture too soft. After cooling, use your hands or a fork to crumble the entire cake into a large bowl until you have fine, uniform crumbs with no large chunks.
- Create Cake Ball Mixture
- Add the cream cheese frosting to your cake crumbs and mix everything together thoroughly. You can use your hands for this – it's messy but effective! The mixture should hold together when squeezed, similar to cookie dough consistency. If it's too dry, add a tablespoon more frosting; if too wet, add some extra cake crumbs.
- Form and Chill Balls
- Scoop about 2 tablespoons of mixture for each ball and roll between your palms to create smooth, uniform spheres. Aim for about 1.5 inches in diameter to make 24 ornaments. Place them on a parchment-lined baking sheet and refrigerate for at least 2 hours or freeze for 30 minutes until they're very firm to the touch.
- Dip in Candy Coating
- Melt your candy melts in separate bowls according to package directions – usually 30-second intervals in the microwave, stirring between each interval. Insert a lollipop stick into each chilled ball, dip completely into the melted coating, and gently tap off excess. Place back on parchment and carefully remove the stick, smoothing over the hole with your finger. Work quickly as the coating sets fast.
- Add Golden Caps
- While your coated balls are setting, prepare the donut holes by spraying them with gold edible spray or brushing with gold luster dust mixed with vodka or lemon extract. Let them dry completely. Once your cake balls have set (about 10 minutes), use a small dab of melted candy coating to attach a golden donut to the top of each ornament.
- Decorate with Icing
- Fill a piping bag fitted with a small round tip with white icing. Get creative and pipe different designs on each ornament – snowflakes, swirls, polka dots, zigzags, or scrollwork. While the icing is still wet, you can add sprinkles, edible pearls, or dragees for extra sparkle. Let everything set completely for 30 minutes before handling or packaging your beautiful edible ornaments.
 pin it
Switch Things Up
I first made these cake ball ornaments three years ago when I wanted to bring something unique to our family's Christmas Eve gathering. I was nervous about the decorating part, but once I got into a rhythm with the piping bag, it became almost meditative. My niece walked into the kitchen and gasped, thinking I'd bought them from a fancy bakery. The best part was watching everyone hesitate before biting into them because they looked so pretty! Now I make them every year, and I've gotten more creative with the designs – last year I did snowflake patterns on the white ones and candy cane stripes on the red ones. My sister-in-law even requested a batch for her office party. The trick I learned is to chill the cake balls really well before dipping – it makes the coating so much smoother. I also discovered that using a toothpick to create swirl patterns in the wet candy coating adds an elegant touch without needing perfect piping skills.
Perfect Pairings
These Red Velvet Cake Ball Ornaments pair wonderfully with hot beverages during the holiday season. Serve them alongside spiced hot chocolate, peppermint mochas, or a classic cup of coffee for a delightful contrast between warm drinks and cool, sweet treats. They also work beautifully as part of a holiday dessert spread – arrange them with sugar cookies, peppermint bark, and fudge for a colorful, festive display. For an adults-only gathering, pair them with a glass of dessert wine, Irish cream liqueur, or even champagne for a sophisticated twist. If you're serving them at a party, consider placing them in individual cupcake liners alongside other bite-sized treats like chocolate truffles or mini cheesecakes.
 pin it
Frequently Asked Questions
- → Can I use homemade red velvet cake instead of a box mix?
Absolutely! A homemade red velvet cake works perfectly. Just make sure it's completely cooled before crumbling. You'll need about 3-4 cups of crumbled cake total.
- → How far in advance can I make these ornaments?
These cake ball ornaments can be made up to one week in advance when stored in an airtight container in the refrigerator. For longer storage, freeze them for up to one month without the decorative icing, then add decorations after thawing.
- → What if I don't have mini donuts for the caps?
You can use other options like Ferrero Rocher candies, large chocolate chips, or even small cookies. Alternatively, shape a small piece of modeling chocolate or fondant into a cap shape and paint with gold luster dust.
- → Why are my candy melts cracking when I dip the cake balls?
This usually happens when there's too much temperature difference between the cold cake balls and the warm candy coating. Make sure your candy melts aren't too hot – let them cool slightly after melting. Also ensure your cake balls are very firm but not frozen solid.
- → Can I make these with different cake flavors?
Definitely! This technique works with any cake flavor – chocolate, vanilla, lemon, funfetti, or even carrot cake. Just pair it with complementary frosting and adjust your candy melt colors to match your theme.
- → How do I prevent the coating from being too thick?
If your candy coating seems thick, add a teaspoon of coconut oil or vegetable shortening and stir well. This thins the consistency without affecting the taste or setting properties. Make sure you're using candy melts specifically designed for coating, not chocolate chips.
Conclusion
These Red Velvet Cake Ball Ornaments are more than just a dessert – they're edible art that brings joy to any holiday celebration. The combination of rich red velvet cake and tangy cream cheese frosting creates the perfect texture and flavor, while the colorful candy coating and decorative touches make them absolutely stunning. Whether you're gifting them in festive boxes, displaying them on your dessert table, or hanging them on an edible "tree," these ornaments will definitely become a new holiday tradition. They can be made a few days ahead and stored in the refrigerator, making them perfect for busy holiday schedules. Your guests will be amazed that something so beautiful came from your kitchen!