
 pin it
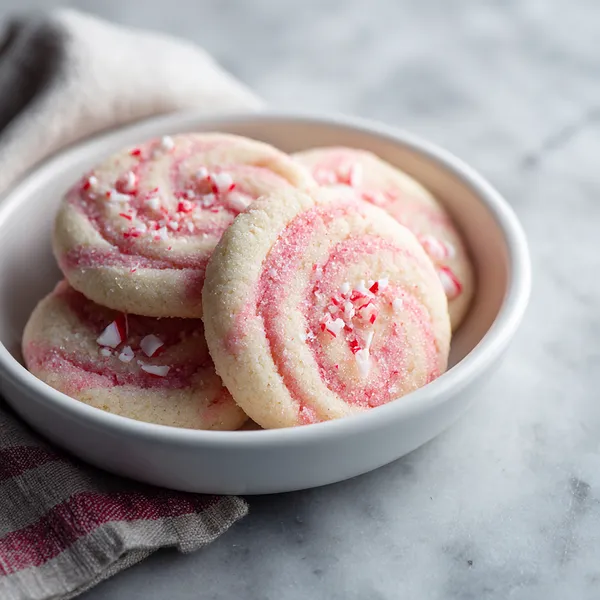
I remember the first time I encountered cookies like these at a holiday market in downtown Chicago. A small bakery had them displayed in their window, each one looking like a tiny work of art with those hypnotic pink and white swirls. I bought a dozen and couldn't stop staring at them before finally taking a bite. The combination of buttery sweetness with that cool peppermint flavor was absolutely perfect—not too minty, not too sweet, just balanced in a way that made me want another immediately. I went home determined to recreate them, spending weeks perfecting the swirl technique and the icing consistency. What I love most about this recipe is how it transforms simple ingredients into something spectacular. The dough is straightforward—just butter, sugar, flour, and a touch of peppermint extract—but when you top it with that swirled icing, magic happens. The key is getting the icing to the right consistency: thick enough to hold the swirl pattern but fluid enough to spread smoothly. I've taught this recipe to countless friends, and everyone is always amazed at how professional-looking these cookies turn out with just a little practice.
Why I love this recipe
There are so many reasons why this recipe holds a special place in my heart. First, these cookies are absolutely stunning to look at—every single one feels like a little piece of edible art, and I never get tired of creating those swirls. But beyond the aesthetics, the flavor is what keeps me coming back. The peppermint isn't overpowering; it's just enough to evoke those cozy holiday feelings without making your mouth feel like you've eaten a tube of toothpaste. The cookie itself is perfectly tender with a slight crispness at the edges, and that buttery richness balances the sweetness of the icing beautifully. I also love how versatile this recipe is—you can adjust the swirl colors for different occasions, add crushed candy canes on top for extra texture, or even sandwich two cookies together with the icing in the middle. But what I truly cherish is how these cookies bring people together. Every time I make them, people gather around to watch the swirling process, and there's always this collective "wow" moment when they see the final result. It's a recipe that creates memories, sparks conversations, and fills hearts with joy—and that's the kind of baking I live for.
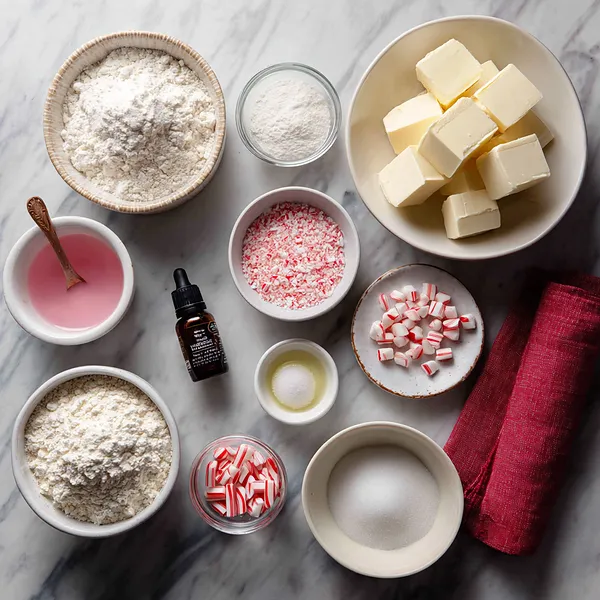
What You Need From Your Kitchen
- All-purpose flour: Provides structure to the cookies; measure accurately by spooning into the cup and leveling off
- Unsalted butter: Must be softened to room temperature for proper creaming with sugar
- Granulated sugar: Sweetens the cookies and helps create a tender texture when creamed with butter
- Egg: Binds the ingredients together and adds richness to the cookie dough
- Peppermint extract: The star flavor that gives these cookies their festive taste
- Powdered sugar: Creates a smooth, glossy icing that sets beautifully on the cookies
- Pink food coloring: Adds the vibrant color needed for the signature peppermint swirl pattern
Let's Make These Together
- Mix the cookie dough base
- Begin by creaming your room-temperature butter and sugar together until the mixture becomes light and fluffy. This step is crucial because it incorporates air into the dough, which helps create a tender cookie texture. Add your egg and extracts, beating until everything is well combined. The mixture should look smooth and slightly pale in color.
- Combine dry and wet ingredients
- In a separate bowl, whisk together your flour, baking powder, and salt to ensure even distribution of the leavening agent. Gradually fold these dry ingredients into your butter mixture, being careful not to overmix. Overmixing develops too much gluten, which can make your cookies tough instead of tender. Mix just until no flour streaks remain.
- Chill and shape the cookies
- Divide your dough, wrap it well, and let it chill in the refrigerator for at least an hour. This resting time allows the flour to fully hydrate and makes the dough much easier to roll out. Once chilled, roll the dough to an even 1/4-inch thickness and cut out your rounds. Place them on parchment-lined baking sheets with enough space between each cookie to allow for slight spreading.
- Bake to golden perfection
- Bake your cookies in a preheated 350°F oven until the edges just start to turn golden. The centers might look slightly underbaked, but they'll continue to set as they cool. This technique ensures you get cookies that are crisp on the edges but still soft and chewy in the middle. Let them rest on the baking sheet for a few minutes before transferring to a cooling rack.
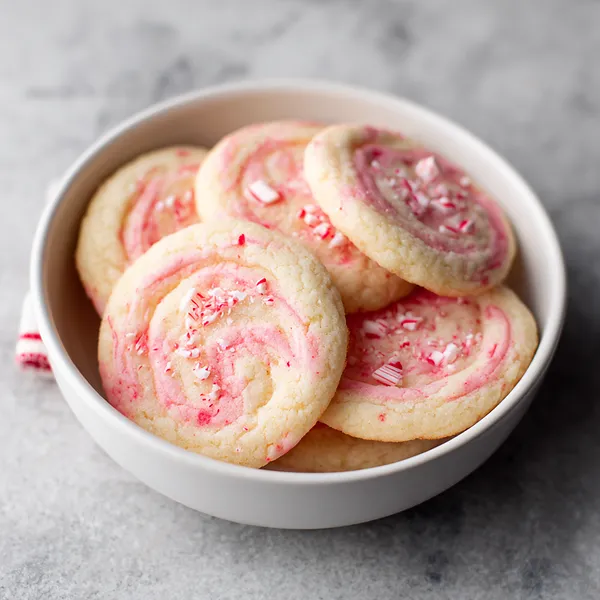
- Create the stunning swirls
- Prepare your icing by mixing powdered sugar and milk to a spreadable consistency. Divide it in half and color one portion pink. Spread white icing on each cooled cookie as your base, then add drops or lines of pink icing on top. Using a toothpick, drag through the pink icing in circular or radiating motions to create those mesmerizing peppermint candy swirls. Each cookie becomes a unique piece of edible art!
 pin it
Switch Things Up
I first made these cookies during a particularly snowy December when I wanted to create something that would capture the magic of the season. My kitchen counter was covered in flour, and I had pink food coloring everywhere, but when I saw those first swirls come together, I was hooked. Now, every holiday season, I make at least three batches—one for the family, one for neighbors, and one that somehow disappears before I can even wrap them up. My niece loves helping with the swirling technique, and we've turned it into our special bonding activity. Last year, we experimented with different swirl patterns, and she created the most beautiful spiral design that looked like actual peppermint candies. These cookies have become more than just a recipe; they're a tradition that brings us together and fills the house with the scent of peppermint and happiness.
Perfect Pairings
These Peppermint Sugar Cookies pair wonderfully with a cup of hot cocoa topped with marshmallows or a rich, creamy cappuccino. For an extra festive touch, serve them alongside a candy cane stirrer in your hot chocolate. They also complement vanilla ice cream beautifully—try crumbling one over a scoop for a peppermint candy crunch topping. If you're hosting a holiday dessert table, display these alongside chocolate fudge brownies and gingerbread cookies for a colorful and delicious spread. A glass of cold milk is always a classic pairing, especially for kids who love dunking their cookies. For adults, pair with peppermint schnapps-spiked coffee for a grown-up holiday treat.
 pin it
Frequently Asked Questions
- → Can I make the dough ahead of time?
Absolutely! The cookie dough can be made up to 3 days in advance and stored in the refrigerator, wrapped tightly in plastic wrap. You can also freeze the dough for up to 3 months. Just thaw it overnight in the refrigerator before rolling and cutting. This actually makes the dough easier to work with and can enhance the flavor as it develops.
- → Why did my cookies spread too much during baking?
Cookie spreading is usually caused by butter that's too soft, dough that wasn't chilled long enough, or an oven that's not hot enough. Make sure your butter is just softened (not melted or too warm), chill your dough for the full hour (or longer), and verify your oven temperature with an oven thermometer. Also, avoid placing cookies on warm baking sheets—let them cool completely between batches.
- → Can I use different colors for the swirls?
Definitely! While pink and white creates that classic peppermint candy look, you can customize the colors for any occasion. Try red and white for Christmas, pastel colors for spring, or even multiple colors for a rainbow effect. Just remember to work quickly while the icing is still wet to achieve clean, beautiful swirls.
- → How should I store these decorated cookies?
Once the icing has fully set (about 30 minutes to an hour), store the cookies in an airtight container at room temperature. Place parchment paper between layers to prevent the icing from sticking or smudging. They'll stay fresh and delicious for up to one week. Avoid refrigerating them as this can make the cookies soft and cause condensation on the icing.
- → Can I freeze these cookies after decorating?
Yes, but it's best to freeze the cookies before decorating. Place undecorated baked cookies in a freezer-safe container with parchment paper between layers, and they'll keep for up to 3 months. Thaw at room temperature and then add the icing. If you do freeze decorated cookies, be aware that the icing might develop some condensation as they thaw, which can slightly affect the appearance.
- → What if my icing is too thick or too thin?
Icing consistency is key for perfect swirls. If it's too thick, add milk one teaspoon at a time until it reaches a honey-like consistency that spreads easily but doesn't run off the cookie. If it's too thin, add more powdered sugar a tablespoon at a time. The icing should be thick enough to hold the swirl pattern but thin enough to spread smoothly across the cookie surface.
Conclusion
These Classic Peppermint Candy Sugar Cookies are the perfect blend of festive charm and delicious flavor. The buttery cookie base provides the ideal canvas for the stunning swirled peppermint icing that makes each cookie a work of art. Whether you're making them for holiday gatherings, cookie exchanges, or simply to brighten a winter day, these cookies deliver both visual appeal and incredible taste. The peppermint flavor is refreshing without being overwhelming, and the cookies maintain their shape beautifully during baking. Store them in an airtight container, and they'll stay fresh for up to a week—though I doubt they'll last that long!