
 pin it
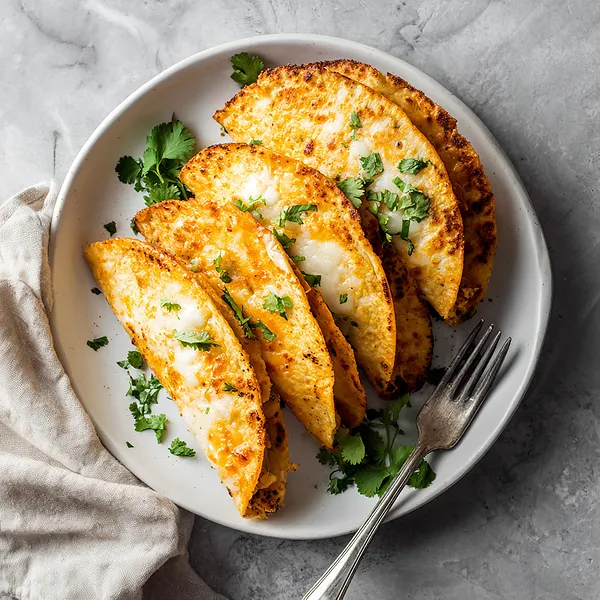
I remember the first time I encountered baked tacos at a friend's potluck years ago. I was skeptical – weren't tacos supposed to be fried or at least assembled fresh? But one bite changed my entire perspective. The shells were somehow crispier than traditional tacos, and the cheese had melted into every corner, creating these amazing crunchy-cheesy bits along the edges. I immediately asked for the method, and it seemed almost too simple to be true. You just stand the tacos up in a baking dish, fill them, top with cheese, and let the oven do its magic. The seasoned ground beef, cooked with just the right blend of spices, stays incredibly moist during baking thanks to the melted cheese sealing everything in. The cilantro and fresh toppings added at the end provide that essential brightness and freshness. What really sold me was how this method solved the eternal taco problem – the messy assembly and eating cold food while you're still cooking for others. Now everyone gets hot, crispy tacos at the same time. The presentation is stunning too, making even a casual weeknight dinner feel a bit special.
Why I love this recipe
This recipe has become one of my absolute favorites for so many reasons. First, it's incredibly practical – I can feed a crowd without feeling chained to the stovetop, flipping individual tacos and getting splattered with oil. The oven does all the work while I prepare sides or simply relax. Second, the results are consistently perfect. Every taco comes out with that ideal crispy shell, gooey cheese, and properly heated filling. There's no guessing or hoping – it just works. Third, this method actually makes the tacos taste better than traditional versions. Something magical happens when that cheese melts and starts to caramelize along the edges of the shells. The flavor becomes deeper, richer, and more complex. I also love how customizable these are. Different family members can have different fillings in the same baking dish, and everyone's happy. Kids get mild cheese, adults can add hot sauce, someone wants extra tomatoes – it all works. Finally, cleanup is a breeze compared to frying tacos. One pan, minimal splatter, and you're done. These tacos represent everything I want in a weeknight dinner: easy, delicious, crowd-pleasing, and actually fun to make.
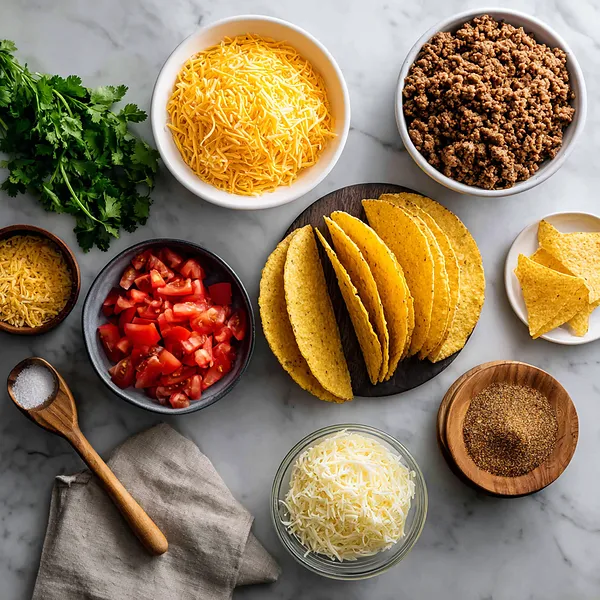
What You Need From Your Kitchen
- Ground Beef: Brown thoroughly and season well for maximum flavor
- Taco Shells: Stand upright in baking dish and fill carefully to avoid cracking
- Cheddar Cheese: Shred generously over filled tacos for that gooey, golden finish
- Taco Seasoning: Mix with cooked beef according to package directions for authentic flavor
- Fresh Cilantro: Chop and sprinkle over finished tacos for a fresh, herbaceous note
- Tomatoes: Dice and add as topping for brightness and moisture
Let's Make These Together
- Prepare the Seasoned Beef
- Start by heating your skillet and browning the ground beef until it's completely cooked through with no pink remaining. This is your flavor foundation, so take your time to break it up into small, even pieces. Once browned, drain the excess fat and stir in your taco seasoning with the specified amount of water. Let it simmer until the sauce thickens and clings to every piece of meat. This step is crucial for developing that authentic taco flavor we all crave.
- Set Up Your Shells
- While your beef is simmering, preheat your oven and prepare your baking dish. The trick to perfect oven-baked tacos is arranging the shells so they stay upright during baking. Stand them up in rows, letting them lean slightly against each other for support. If you're worried about them falling, a little crumpled foil between shells works like a charm. The goal is to have them secure enough that you can fill them without everything toppling over.
- Fill and Top Generously
- Now comes the fun part – filling your tacos! Spoon that delicious seasoned beef into each shell, being careful not to overfill which could cause cracking. Three-quarters full is perfect. Then shower each taco with shredded cheese, making sure to get it along the edges where it will create those irresistible crispy bits. If you're adding diced tomatoes or onions, sprinkle them on now before baking.
- Bake to Golden Perfection
- Slide your baking dish into the preheated oven and let the magic happen. The cheese will melt, bubble, and start to turn golden brown around the edges while the shells crisp up even more. This usually takes about twelve to fifteen minutes, but watch them closely during the final minutes. You want that gorgeous golden color without any burning. When you pull them out, the aroma will be absolutely incredible.
- Finish and Serve Hot
- Let your tacos rest for just a couple of minutes after removing them from the oven – this lets the cheese set slightly so it doesn't slide right off when you bite in. Garnish with fresh cilantro for that pop of color and fresh flavor, then serve immediately with all your favorite toppings like sour cream, guacamole, and extra salsa. These are best enjoyed hot and fresh from the oven when the shells are at peak crispiness.
 pin it
Switch Things Up
I first made these oven-baked tacos on a particularly hectic Tuesday evening when I had six hungry people to feed and zero patience for standing at the stove. I arranged the filled taco shells in a baking dish, thinking it might be a disaster, but hoping for the best. Twenty minutes later, when I pulled that pan from the oven, the kitchen smelled incredible and those tacos looked like they belonged in a food magazine. Everyone devoured them, and my teenage nephew actually asked for the recipe – something that had never happened before. Now I make these at least twice a month, sometimes adding jalapeños when we're feeling spicy, other times keeping it mild for the kids. The best part is watching the cheese bubble and turn golden through the oven door. I've experimented with different cheeses too – a Mexican blend works beautifully, and sometimes I'll add a layer of refried beans before the meat for extra heartiness.
Perfect Pairings
These Oven-Baked Cheesy Tacos pair wonderfully with classic Mexican rice and refried beans for a complete meal. A fresh pico de gallo or chunky guacamole on the side adds bright flavors that complement the richness of the cheese. For drinks, consider serving them with cold Mexican beer, fresh lime margaritas, or even a tangy agua fresca. A simple cabbage slaw with lime dressing provides a refreshing crunch that contrasts beautifully with the warm, cheesy tacos. For dessert, churros or tres leches cake would round out your Mexican feast perfectly.
 pin it
Frequently Asked Questions
- → Can I make these tacos ahead of time?
You can prepare the seasoned beef filling in advance and store it in the refrigerator for up to 3 days. However, for best results, assemble and bake the tacos just before serving to maintain maximum crispiness. If you must prepare them completely ahead, store assembled unbaked tacos in the refrigerator and add 5 extra minutes to the baking time when cooking from cold.
- → What's the best way to keep the taco shells from getting soggy?
The key is not overfilling the shells and using well-drained, thoroughly cooked meat. You can also add a thin layer of cheese to the bottom of each shell before adding the meat, which creates a moisture barrier. Additionally, serving the tacos immediately after baking prevents moisture from accumulating and softening the shells.
- → Can I use soft tortillas instead of hard shells?
While this recipe is designed for hard taco shells, you can adapt it for soft tortillas by making them into enchiladas instead. Roll the filled tortillas, place them seam-side down in the baking dish, top with cheese, and bake. The cooking method and flavors will be similar, just with a different texture.
- → How do I prevent the taco shells from falling over during baking?
Arrange the shells so they lean slightly against each other in rows, which creates mutual support. You can also use small pieces of crumpled aluminum foil placed between shells to help prop them up. Another option is to use a specialized taco holder or rack designed for oven baking, which keeps shells perfectly upright.
- → What other proteins work well in this recipe?
Ground turkey, chicken, or pork all work wonderfully as substitutes for beef. You can also use shredded rotisserie chicken mixed with taco seasoning for an even quicker version. For a vegetarian option, seasoned black beans, refried beans, or a mixture of sautéed vegetables with taco seasoning would be delicious alternatives that work with the same baking method.
- → Why is my cheese not getting golden and crispy?
Make sure your oven is fully preheated to 375°F before baking. If the cheese isn't browning, you can turn on the broiler for the last 1-2 minutes of cooking, watching very carefully to prevent burning. Also, using freshly shredded cheese instead of pre-shredded will melt and brown better since it doesn't contain anti-caking agents.
- → Can I freeze these baked tacos?
While you can technically freeze baked tacos, the shells will lose their crispiness when thawed and reheated. For better results, freeze just the seasoned meat filling and assemble fresh tacos when you're ready to serve. If you do freeze complete tacos, reheat them in a 350°F oven rather than the microwave to restore as much crispiness as possible.
Conclusion
These Oven-Baked Cheesy Tacos have completely transformed taco night in my kitchen. The convenience of baking them all at once means less time cooking and more time enjoying dinner with loved ones. The crispy shells combined with the savory seasoned beef and gooey melted cheese create a texture and flavor combination that's simply unbeatable. Whether you're feeding a hungry family or hosting friends for a casual dinner, these tacos deliver every single time.