
 pin it
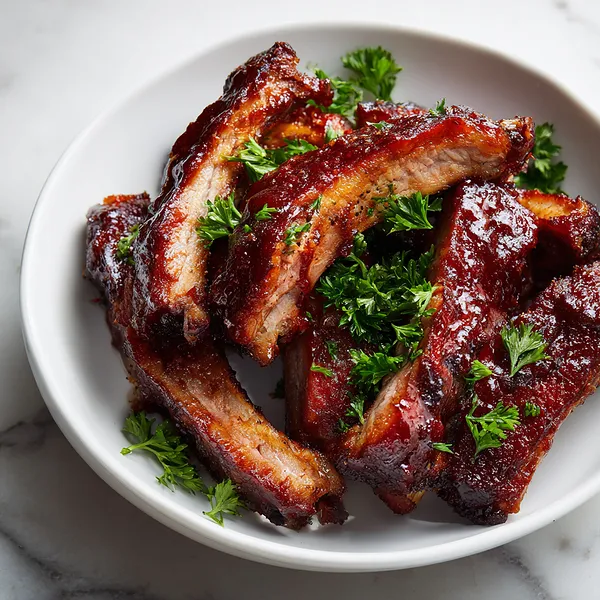
I first encountered truly great BBQ ribs at a small roadside joint during a summer road trip, and I've been chasing that perfect combination of tender meat and sticky glaze ever since. This recipe is my answer to recreating that magic at home, any time of year. These oven-baked ribs start with a simple but flavorful dry rub that penetrates the meat during the initial slow roasting phase. The ribs are wrapped tightly in foil, creating a steamy environment that breaks down the tough connective tissue and renders the fat beautifully. After a couple of hours, they emerge impossibly tender. Then comes the transformation – we brush on a homemade BBQ sauce that's perfectly balanced between sweet brown sugar and honey, tangy apple cider vinegar and ketchup, and aromatic spices like smoked paprika and garlic. Multiple layers of sauce get caramelized under high heat, creating that signature sticky coating. The result is ribs that are fall-off-the-bone tender with a gorgeous mahogany glaze that's finger-licking good. Every bite delivers smoky depth, sweet tanginess, and melt-in-your-mouth texture.
Why I love this recipe
I love this recipe because it takes the intimidation factor out of making ribs and delivers consistently spectacular results. There's something deeply satisfying about transforming a simple rack of ribs into something that looks and tastes like it came from a professional BBQ pit master. The low-and-slow oven method is forgiving and hands-off – you can prep the ribs, pop them in the oven, and go about your day while they work their magic. But what really makes my heart sing is that final step when you brush on the sauce and broil it until it's bubbling and caramelized. Watching that glaze turn glossy and sticky is pure kitchen joy. Beyond the cooking process, these ribs bring people together. There's something primal and communal about eating ribs with your hands, getting a little messy, and enjoying seriously good food. Whether it's a casual family dinner or a celebration with friends, these ribs always steal the show and create memorable moments around the table.
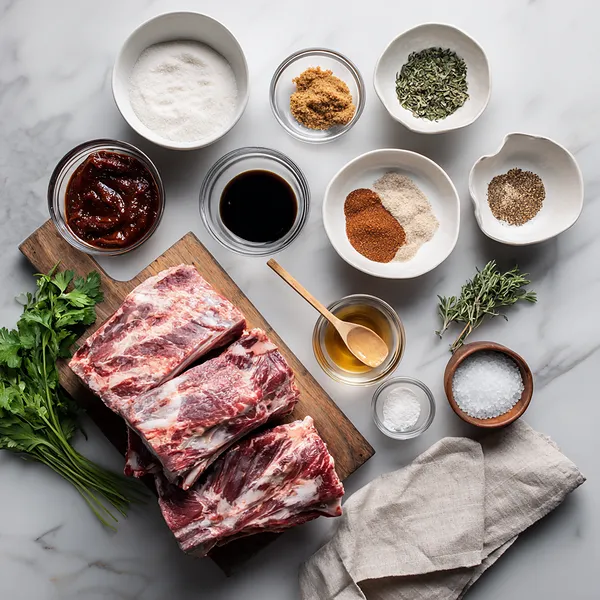
What You Need From Your Kitchen
- Baby Back Ribs: Choose racks that are meaty with good marbling. Remove the membrane from the back for maximum tenderness.
- Brown Sugar: Provides sweetness and helps create the sticky caramelized glaze. Dark brown sugar adds deeper molasses flavor.
- Apple Cider Vinegar: Adds tanginess and helps tenderize the meat while balancing the sweetness of the sauce.
- Worcestershire Sauce: Contributes umami depth and complexity to the BBQ sauce.
- Smoked Paprika: Delivers smoky flavor without needing a smoker or grill.
- Honey: Adds natural sweetness and helps the sauce stick to the ribs during caramelization.
Let's Make These Together
- Prepare and Season the Ribs
- Start by preheating your oven to a low temperature of 275°F. The key to tender ribs is removing that tough membrane on the back – slide a butter knife underneath to loosen it, then grab it with a paper towel and peel it off in one satisfying strip. Pat the ribs completely dry with paper towels, then season both sides generously with your spice blend. Don't be shy here – the ribs need bold flavor to stand up to the long cooking time. Let them sit at room temperature while you prepare everything else.
- Slow Roast in Foil
- Wrap each rack of ribs tightly in aluminum foil, making sure there are no gaps or holes where steam can escape. This foil packet is your secret weapon – it traps moisture and creates a steamy environment that breaks down the tough connective tissue in the ribs. Place the wrapped ribs on a baking sheet and slide them into the oven. Now comes the hard part: patience. Let them roast low and slow for 2.5 to 3 hours until the meat is so tender it's pulling away from the bones.
- Create the Perfect BBQ Sauce
- While the ribs work their magic in the oven, it's time to make that irresistible sticky sauce. Combine all your sauce ingredients in a saucepan – ketchup for body, brown sugar and honey for sweetness, vinegar for tang, and spices for depth. Bring it to a gentle simmer, stirring to dissolve the sugar, then reduce the heat and let it bubble away for 10-15 minutes. You'll know it's ready when it coats the back of a spoon and has thickened slightly. Taste and adjust – want more heat? Add cayenne. More tang? A splash more vinegar.
- Glaze and Caramelize
- This is where the magic happens. Carefully unwrap those tender ribs and transfer them to a clean baking sheet. Crank up the oven temperature to 400°F. Now brush on that beautiful sauce generously – don't hold back. Pop them back in the oven for 10 minutes, then brush on another layer and switch to the broiler. Watch them closely as the sauce bubbles and caramelizes into that gorgeous sticky glaze. The sugars will darken and the sauce will become glossy and irresistible. Give them one final brush of sauce, let them rest for a few minutes, then slice and serve.
 pin it
Switch Things Up
I'll never forget the first time I made these ribs on a rainy Saturday when I couldn't fire up the grill. I was skeptical about oven-baked ribs, thinking they'd be dry or lack that smoky flavor. Boy, was I wrong! As the ribs cooked low and slow, my entire apartment filled with the most incredible aroma. When I unwrapped that foil after two hours, the meat was so tender it was practically falling off the bone. Then came the fun part – brushing on layer after layer of that sticky, glossy BBQ sauce and watching it caramelize under the broiler. The first bite was a revelation: smoky, sweet, tangy, with meat so tender you barely needed teeth. Now I make these year-round, rain or shine, and they've become my signature dish for gatherings.
Perfect Pairings
These sticky BBQ ribs pair beautifully with classic comfort sides that complement their bold, sweet-savory flavors. Try serving them with creamy coleslaw for a cool, crunchy contrast, or alongside baked beans with a touch of bacon for double the smokiness. Cornbread or garlic bread works wonderfully to soak up that extra sauce, while mac and cheese adds indulgent creaminess. For lighter options, consider grilled corn on the cob brushed with herb butter, or a fresh cucumber and tomato salad with a tangy vinaigrette. Don't forget cold beverages – iced tea, lemonade, or your favorite beer are perfect matches for these rich, flavorful ribs.
 pin it
Frequently Asked Questions
- → Can I make these ribs ahead of time?
Absolutely! You can complete the slow-roasting step up to a day in advance. Wrap the foil-cooked ribs and refrigerate them. When ready to serve, bring them to room temperature, then proceed with the glazing and broiling steps. This actually makes the recipe more manageable for entertaining.
- → What if I don't have a broiler?
No problem! After brushing with sauce, you can continue roasting at 400°F for an additional 15-20 minutes, brushing with sauce every 5 minutes. The glaze won't caramelize quite as intensely, but you'll still get delicious sticky ribs. Alternatively, if weather permits, you can finish them on a hot grill for that caramelized exterior.
- → How do I know when the ribs are done?
The meat should be tender enough that it pulls away from the bones easily but doesn't completely fall off. You can test by trying to twist a bone – if it moves easily, they're ready. The internal temperature should reach about 190-203°F for maximum tenderness, though this isn't strictly necessary if you follow the timing guidelines.
- → Can I use a different type of ribs?
Yes! Spare ribs work well but require 30-45 minutes longer cooking time due to their larger size and tougher meat. St. Louis style ribs (trimmed spare ribs) are also excellent. Avoid back ribs from larger pigs as they can be tough. Baby back ribs remain the most reliable choice for tender, quick-cooking results.
- → My sauce is too thin, how can I thicken it?
If your BBQ sauce seems too runny, continue simmering it on low heat until it reduces and thickens to your desired consistency. You can also add a tablespoon of tomato paste or a teaspoon of cornstarch mixed with water. Remember that the sauce will thicken further as it cools and caramelizes on the ribs during broiling.
- → Can I freeze cooked ribs?
Yes, these ribs freeze beautifully! After the slow-roasting step (before glazing), let the ribs cool completely, wrap them tightly in plastic wrap and then foil, and freeze for up to 3 months. Thaw overnight in the refrigerator, then proceed with the glazing and broiling steps. You can also freeze fully cooked, glazed ribs and reheat them in a 350°F oven.
Conclusion
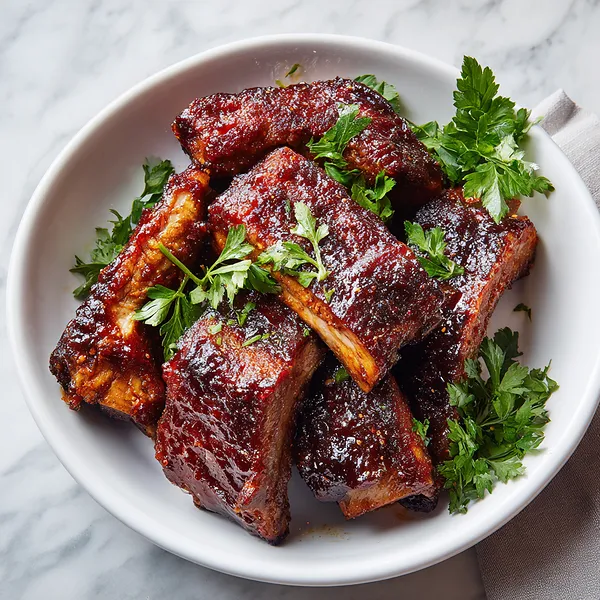
These sticky oven-baked BBQ ribs prove you don't need a smoker or grill to achieve restaurant-quality results. The low-and-slow cooking method ensures tender meat that pulls away from the bone effortlessly, while the homemade BBQ sauce provides that signature sticky glaze everyone craves. Whether you're serving these at a family dinner, game day party, or casual weekend meal, they're guaranteed to impress. The beauty of this recipe lies in its simplicity and flexibility – you can adjust the spice level, sweetness, or smokiness to match your preferences perfectly.