
 pin it
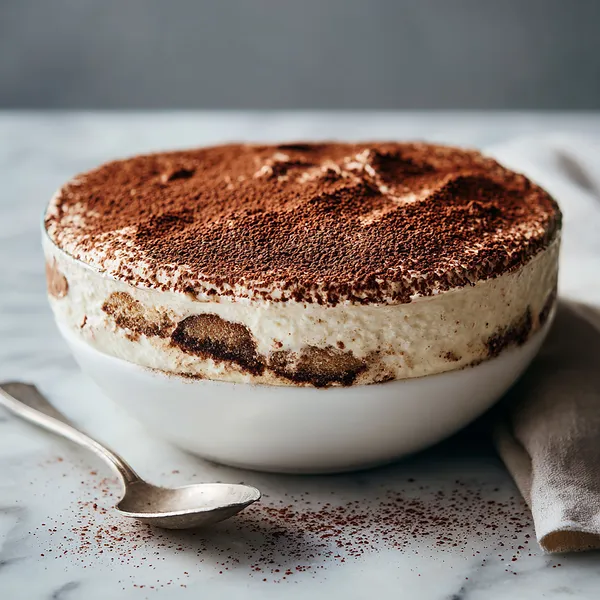
I'll never forget my first encounter with real tiramisu – I was at a small trattoria in my neighborhood, skeptical about trying something that translated to "pick me up." When the waiter set down that gorgeous layered dessert, I was mesmerized by how elegant it looked. The first bite was a revelation: the coffee-soaked cookies were soft but not mushy, the mascarpone cream was impossibly light yet rich, and that dusting of cocoa added a sophisticated bitter note that tied everything together. From that moment, I was obsessed with recreating it at home. This no-bake version captures everything I love about the classic – those distinct layers of flavor and texture, the perfect balance of sweet and bitter, the way the cream melts on your tongue. What I appreciate most is how the recipe respects the traditional method while being accessible for home cooks. You don't need fancy equipment or hard-to-find ingredients, just a little patience and attention to detail. The magic happens in the refrigerator, where all those flavors meld together overnight. Every time I make this, I'm transported back to that first incredible bite, and I get to share that experience with others.
Why I love this recipe
I love this recipe because it proves that the most impressive desserts don't always require turning on the oven. There's something incredibly satisfying about creating such an elegant, restaurant-quality dessert with just a bowl, a whisk, and a little time. The no-bake aspect means I can make this even on the hottest summer days without heating up my kitchen, which is a huge win. What really makes my heart sing is how forgiving this recipe is – if you slightly overwhip the cream or soak the cookies a tad too long, the end result is still delicious. I also adore the make-ahead nature of this dessert; knowing I have this beauty waiting in my fridge for dinner guests takes so much pressure off. The visual appeal is another reason I keep coming back to it – those distinct layers look absolutely stunning, especially when served in clear glass dishes. But honestly, the main reason I love this recipe is the reaction it gets. People assume tiramisu is complicated and fancy, so when they learn it's no-bake and relatively simple, they're always amazed. It's become my signature dessert, the one everyone requests, and that never gets old. Plus, the combination of coffee and cream is just perfection – it's sophisticated enough for adults but loved by everyone.
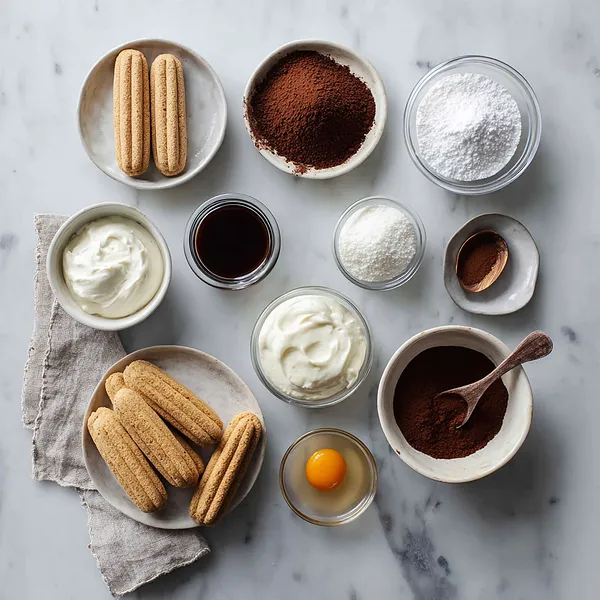
What You Need From Your Kitchen
- Mascarpone Cheese: Bring to room temperature for 30 minutes before using to ensure smooth mixing without lumps
- Heavy Cream: Keep cold in the refrigerator until ready to whip for best volume and stiff peaks
- Espresso or Coffee: Brew strong and allow to cool completely before dipping the ladyfingers
- Ladyfinger Cookies: Use authentic Italian savoiardi for best texture and structure when soaked
- Egg Yolks: Separate carefully and whisk with sugar over double boiler until thick and pale
- Cocoa Powder: Sift generously over the top layer just before serving for best presentation
Let's Make These Together
- Whip the Egg Base
- Start by creating your luxurious egg yolk mixture using a double boiler. This technique gently heats the eggs while you whisk, creating a thick, custard-like base that's safe to eat and incredibly silky. The key is patience – keep whisking for those full 8-10 minutes until you see the mixture transform from liquid to ribbons. This step is what gives tiramisu its signature richness and body. Once it's reached that perfect thick consistency, remove it from heat and let it cool while you prepare the other components. The cooled egg mixture will be the foundation of your creamy filling.
- Build the Cream
- Now comes the fun part – assembling your mascarpone cream. Beat that room temperature mascarpone until it's silky smooth, then gently fold in your cooled egg mixture. The folding technique is crucial here; you want to preserve all that air you've worked to incorporate. In a separate bowl, whip your cold heavy cream until you get those beautiful stiff peaks – this is what makes the tiramisu light and cloud-like. Fold the whipped cream into your mascarpone mixture with a light hand, working in batches to maintain that airy texture. The result should be a fluffy, dreamy cream that's almost too pretty to layer away.
- Soak and Layer
- Here's where your tiramisu comes to life. Pour your cooled espresso into a shallow dish – this makes dipping so much easier. Take each ladyfinger and give it a quick dip, just 2-3 seconds per side. You want them moistened but still holding their shape; they'll continue to soften as the dessert sits. Arrange your first layer of dipped cookies snugly in your dish, then spread half of that gorgeous mascarpone cream on top. Repeat the layers, and you'll see your tiramisu taking shape. Smooth that top layer with care – this is going to be your canvas for that final cocoa dusting.
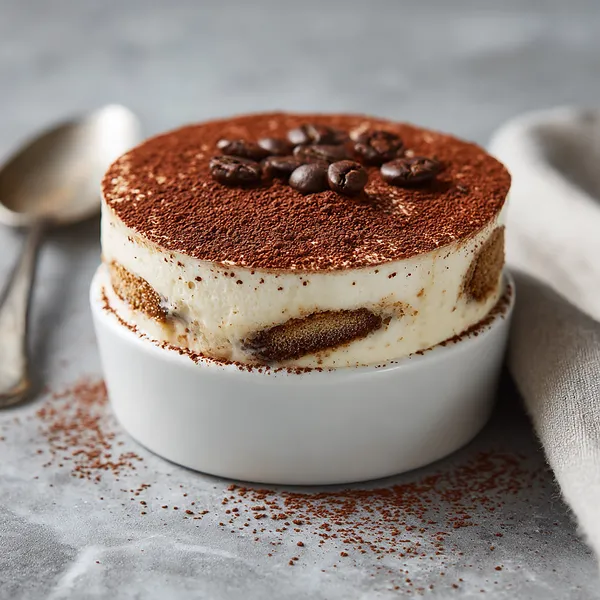
- Chill and Dust
- The hardest part is the waiting. Cover your tiramisu and let it chill for at least 4 hours, but overnight is truly best. This resting time allows all the flavors to marry together and the texture to become perfectly creamy. When you're ready to serve, remove it from the fridge and generously dust the top with cocoa powder using a fine sieve. This final touch not only looks stunning but adds that essential bitter note that balances the sweetness. Cut into portions and serve each piece with pride – you've just created an Italian masterpiece.
 pin it
Switch Things Up
I first made this tiramisu for my best friend's birthday dinner, and I was honestly a bit nervous because she had just returned from a trip to Italy where she'd eaten the "real deal." I followed the recipe carefully, making sure each ladyfinger was perfectly soaked but not soggy, and whipped the mascarpone cream until it was cloud-like. When I pulled it from the fridge and dusted that final layer of cocoa on top, it looked absolutely stunning. The moment of truth came when she took her first bite – her eyes widened, and she declared it was just as good as what she'd had in Rome. I couldn't believe it! Since then, I've made this tiramisu for countless gatherings, and it never fails to impress. There's something magical about watching people take that first spoonful and see their faces light up. The best part is sneaking a taste while assembling it – those coffee-soaked cookies are dangerously addictive.
Perfect Pairings
This tiramisu pairs beautifully with a strong espresso or cappuccino to echo the coffee flavors in the dessert. For a special occasion, serve it alongside a glass of sweet dessert wine like Vin Santo or Moscato d'Asti, which complements the creamy richness without overwhelming it. If you're serving this as part of a larger Italian feast, it's the perfect finale after a hearty pasta dish or osso buco. For a coffee lover's dream pairing, try it with an affogato on the side, or serve fresh berries like raspberries or strawberries to cut through the richness. A simple biscotti cookie on the side also makes for a delightful textural contrast.
 pin it
Frequently Asked Questions
- → Can I make tiramisu without raw eggs?
Absolutely! You can use pasteurized eggs which are safe to consume without cooking, or heat your egg and sugar mixture in the double boiler to 160°F while whisking constantly to pasteurize them. Some recipes also use just mascarpone and whipped cream without eggs, though the texture will be slightly different.
- → How long does tiramisu need to set in the refrigerator?
Tiramisu needs a minimum of 4 hours to set properly, but it's best when made the day before and allowed to chill overnight. This gives the ladyfingers time to soften completely and allows all the flavors to meld together beautifully. It can be made up to 2 days in advance.
- → Can I use regular coffee instead of espresso?
Yes, you can definitely use strong brewed coffee instead of espresso. Just make sure it's brewed stronger than you'd normally drink it – use about 2-3 tablespoons of coffee grounds per cup of water. The flavor should be bold enough to come through in the finished dessert.
- → What if I can't find mascarpone cheese?
If mascarpone is unavailable, you can make a substitute by blending 8 ounces of room temperature cream cheese with 1/4 cup heavy cream and 2 tablespoons sour cream until smooth. While it won't be exactly the same, it's a decent alternative that will still give you a creamy, delicious tiramisu.
- → Why did my mascarpone cream turn grainy?
Mascarpone can become grainy if it's too cold when you start mixing, if you overmix it, or if you add ingredients that are different temperatures. Always bring mascarpone to room temperature before using, mix gently, and make sure all your components are at similar temperatures when combining. If it does turn grainy, you can try whisking in a tablespoon of warm cream to smooth it out.
- → Can tiramisu be frozen?
Yes, tiramisu can be frozen for up to 3 months. Wrap it tightly in plastic wrap and then aluminum foil. Thaw overnight in the refrigerator before serving. The texture may be slightly different after freezing, but it will still be delicious. It's best to dust with fresh cocoa powder after thawing.
Conclusion
This no-bake tiramisu is the perfect dessert for any occasion, whether you're hosting a dinner party or simply treating yourself to something special. The combination of rich mascarpone, bold espresso, and delicate ladyfingers creates a harmonious balance that's both elegant and comforting. What makes this recipe truly special is its simplicity – no baking required means less stress and more time to enjoy with loved ones. The longer it sits in the refrigerator, the better the flavors meld together, making it an ideal make-ahead dessert. Once you master this classic recipe, you'll find yourself making it again and again.