
 pin it
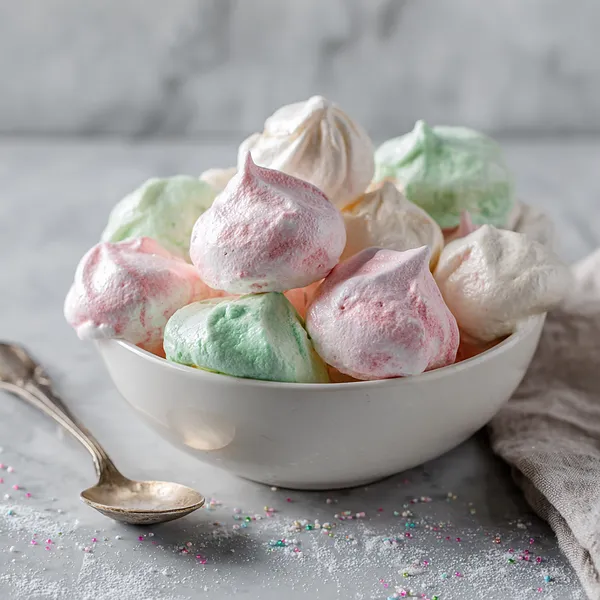
I first encountered meringue kisses at a French patisserie during a winter trip to Paris, where they were displayed in the window like tiny works of art. I was captivated by their delicate beauty and had to try one immediately. The moment it touched my tongue, it began to dissolve, releasing a subtle sweetness that was utterly enchanting. When I returned home, I was determined to recreate that experience in my own kitchen. This recipe is my adaptation of those perfect Parisian meringues, made festive with pastel colors and sparkly sprinkles. The technique requires attention – you must whip the egg whites to just the right consistency, add sugar gradually, and bake them low and slow until they're completely dried out. But the reward is worth every careful step. Each meringue kiss is a tiny celebration, light as air yet satisfying in its sweetness. The colors make them feel special and festive, perfect for holidays but honestly wonderful any time you want to add a touch of whimsy to your day. They're proof that sometimes the most impressive desserts come from the simplest ingredients handled with patience and love.
Why I love this recipe
I love this recipe because it transforms humble egg whites and sugar into something truly spectacular. There's a kind of alchemy in watching those clear, liquid egg whites transform into glossy, white peaks that hold their shape perfectly. The process is meditative and satisfying – there's nothing quite like the feeling of piping perfect swirls onto parchment paper, knowing they'll emerge from the oven as crispy, melt-in-your-mouth treats. What I especially appreciate is how forgiving meringues can be once you understand the basics; they're actually easier than their elegant appearance suggests. I love that they're naturally gluten-free, making them inclusive for friends with dietary restrictions, and they're virtually fat-free, so you can enjoy several without any guilt. The festive colors and sprinkles make them feel special and celebratory, and they never fail to impress guests who think they're far more complicated than they actually are. I also adore how well they store – you can make them weeks in advance and they'll stay perfect in an airtight container, which is a lifesaver during busy holiday seasons. Most of all, I love giving these as gifts; there's something deeply personal about handmade treats, and these little kisses deliver joy in the most delightful way.
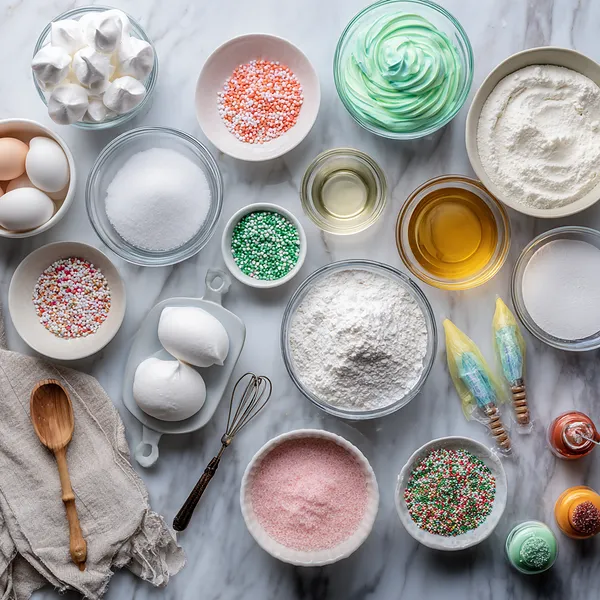
What You Need From Your Kitchen
- Egg whites: Separate carefully ensuring no yolk gets in, bring to room temperature for at least 30 minutes before using
- Granulated sugar: Measure precisely and add gradually while beating to create stable meringue
- Cream of tartar: Add to egg whites at the beginning to stabilize them and help achieve stiff peaks
- Vanilla extract: Fold in gently at the end for subtle flavor without deflating the meringue
- Gel food coloring: Use toothpick amounts to tint portions of meringue in pastel pink and green shades
- Colorful sprinkles: Sprinkle immediately on piped meringues before they begin to set
Let's Make These Together
- Prepare Your Workspace
- Before you begin, make sure everything is impeccably clean and dry. Wipe down your mixing bowl and beaters with white vinegar or lemon juice to remove any traces of grease that could prevent your egg whites from reaching their full volume. Line your baking sheets with parchment paper and preheat your oven to the low temperature of 200°F. This low-and-slow approach is the secret to crispy, perfectly dried meringues that melt on your tongue.
- Whip the Egg Whites
- Start by beating your room-temperature egg whites with cream of tartar on medium speed until they become foamy and start to hold soft peaks. This is where patience pays off – gradually add your sugar one tablespoon at a time, allowing each addition to fully incorporate before adding more. Once all the sugar is in, increase the speed to high and beat until the meringue forms stiff, glossy peaks that stand straight up when you lift the beaters. The mixture should look smooth, shiny, and feel slightly gritty between your fingers as the sugar dissolves. Add the vanilla and give it one final beat.
- Create Colorful Portions
- Gently divide your perfect meringue into three equal portions. Leave one bowl pristine white, and use tiny amounts of gel food coloring to tint the others soft pastel pink and mint green. Fold the coloring in with a light hand using a spatula, turning the bowl and cutting through the meringue gently to avoid deflating all those air bubbles you worked so hard to create. The goal is pastel, dreamy shades that evoke holiday magic.
- Pipe and Decorate
- Transfer each colored meringue into its own piping bag fitted with a large star tip. Hold the bag vertically above your parchment-lined baking sheet and pipe small swirled kisses, about an inch in diameter, spacing them evenly across the sheet. The star tip creates those beautiful ridges that catch the light so prettily. Work quickly but carefully, and immediately dust each kiss with colorful sprinkles before the meringue surface begins to dry and set.
- Bake Low and Slow
- Slide your baking sheets into the preheated oven and set a timer for 90 minutes. The key here is patience – resist the urge to open the oven door, as temperature fluctuations can cause cracks. After the timer goes off, turn off the oven but leave the meringues inside with the door closed. Let them cool completely in the oven for at least an hour, or even better, overnight. This gradual cooling and drying process ensures perfectly crispy meringues that shatter delicately when you bite into them. Once cooled, store them in an airtight container and enjoy these little clouds of sweetness for weeks to come.
 pin it
Switch Things Up
I'll never forget the first time I attempted meringues – I was convinced I'd ruin them, but my grandmother walked me through it over the phone, her calm voice guiding me as I nervously whisked those egg whites. When they finally formed stiff, glossy peaks, I felt like I'd accomplished something magical. Now, every holiday season, I make batches of these colorful kisses, and they've become a tradition in my home. I love experimenting with different color combinations – last year I did lavender and gold, and they were stunning. The key is patience; you can't rush meringues. I've learned to embrace the slow bake time as part of the meditative process. Sometimes I'll make them on a quiet Sunday afternoon, piping away while listening to music, and by evening, my kitchen is filled with these little treasures. They remind me that the simplest ingredients can create the most extraordinary results when treated with care and attention.
Perfect Pairings
These delicate meringue kisses pair beautifully with a variety of holiday treats and beverages. Serve them alongside rich hot chocolate or creamy eggnog to balance their light sweetness. They're wonderful with coffee or tea during afternoon gatherings, and they complement fresh berries and whipped cream for an elegant dessert plate. Try arranging them on a platter with chocolate truffles, shortbread cookies, and candied nuts for a stunning dessert spread. They also make charming toppers for ice cream sundaes, cakes, or pavlovas, adding both texture and visual appeal to any dessert presentation.
 pin it
Frequently Asked Questions
- → Why didn't my meringue form stiff peaks?
This usually happens when there's even a tiny bit of fat or egg yolk in your egg whites. Make sure your bowl and beaters are completely clean and grease-free. Also, ensure your eggs are at room temperature, as cold eggs don't whip up as well. Finally, be patient with adding the sugar gradually – dumping it all in at once can prevent proper peak formation.
- → Can I make meringues on a humid day?
It's best to avoid making meringues on very humid or rainy days, as the moisture in the air can prevent them from drying out properly and make them sticky. If you must make them, you can try running a dehumidifier in your kitchen or extending the baking and drying time slightly.
- → How do I know when my meringues are done?
Properly baked meringues should easily lift off the parchment paper without sticking, and they should feel light and dry to the touch. If they feel sticky or soft, they need more time in the oven. You can also gently tap the bottom of a meringue – it should sound hollow rather than soft.
- → Can I use liquid food coloring instead of gel?
While you can use liquid food coloring, gel or powder food coloring is strongly recommended because liquid adds extra moisture to the meringue, which can affect its texture and stability. Gel colorings are more concentrated, so you need less, and they won't compromise the structure of your meringues.
- → How long will meringue kisses stay fresh?
When stored properly in an airtight container at room temperature, meringue kisses will stay crispy and delicious for up to 3 weeks. Make sure they're completely cooled before storing, and consider adding a small silica gel packet to the container to absorb any moisture. Never refrigerate meringues, as the moisture in the fridge will make them soft and sticky.
- → Why did my meringues crack during baking?
Cracking typically occurs when the oven temperature is too high or when there are sudden temperature changes. Make sure your oven is properly calibrated to 200°F, and never open the oven door during baking. Also, allowing the meringues to cool gradually inside the turned-off oven helps prevent cracking.
Conclusion
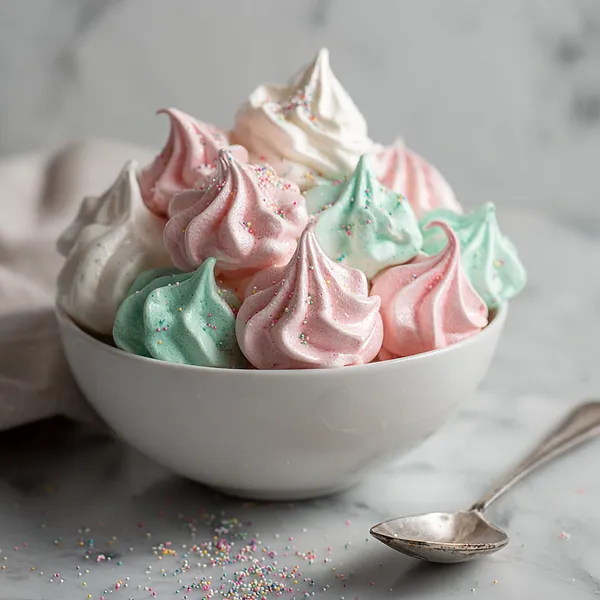
These Festive Holiday Meringue Kisses are the perfect addition to your holiday baking repertoire. They're light, beautiful, and surprisingly simple once you get the hang of the technique. The pastel colors and sparkly sprinkles make them irresistible for any celebration, and they store beautifully in an airtight container for weeks. Whether you're hosting a party, filling a cookie tin, or just want to brighten someone's day, these meringues deliver pure joy in every bite.