
 pin it
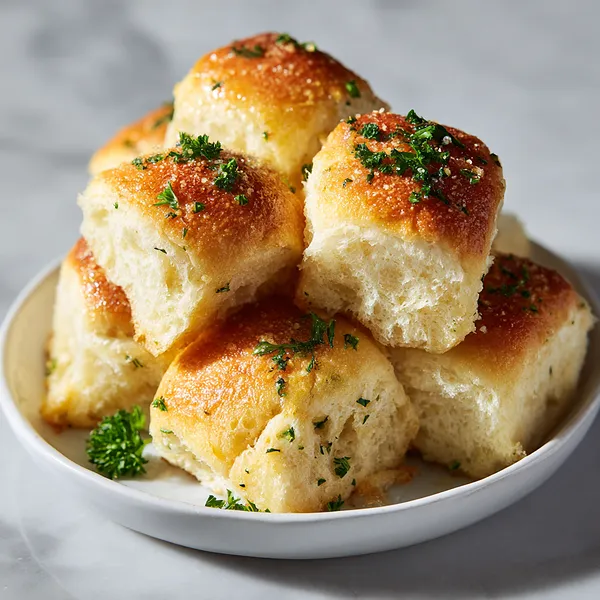
I first discovered the magic of homemade dinner rolls at a small family-owned Italian restaurant years ago. They brought out a basket of warm, butter-brushed rolls before our meal, and I was completely hooked. I spent months trying to recreate that perfect texture at home – soft and pillowy inside with a slightly golden exterior. After many attempts, I finally nailed it with this recipe. The secret is in the double rise and not overworking the dough. When I brush on the garlic butter made with fresh minced garlic, melted butter, and parsley right after baking, it creates this incredible aroma and flavor that reminds me of that restaurant every single time. These rolls have become my signature dish. I love how versatile they are – fancy enough for holidays but simple enough for weeknight dinners. The way they pull apart into soft, buttery layers is just perfection.
Why I love this recipe
I love this recipe because it proves that homemade bread doesn't have to be complicated or time-consuming. Yes, there's rising time involved, but the actual hands-on work is minimal and so rewarding. There's something deeply satisfying about working with yeast dough – watching it transform and rise feels almost magical. These rolls make any meal feel special, whether it's a casual family dinner or a holiday feast. I also love how forgiving this recipe is. Even if you're new to bread baking, you'll get great results. The garlic butter topping is what really sets these apart from regular dinner rolls. It adds so much flavor and that gorgeous glossy finish. Plus, the smell while they're baking is absolutely incredible – it fills your whole house with warmth. These rolls bring people together. I've seen conversations stop mid-sentence when I bring these to the table. They're comfort food at its finest.
What You Need From Your Kitchen
- All-purpose flour: Forms the base structure of the rolls, providing that soft and fluffy texture
- Active dry yeast: Creates the rise and airy texture that makes these rolls so light and pillowy
- Warm milk: Activates the yeast and adds richness to the dough
- Unsalted butter: Provides moisture, flavor, and that tender crumb in the finished rolls
- Garlic cloves: Infuses the butter topping with aromatic, savory flavor
- Fresh parsley: Adds color and fresh herbal notes to the garlic butter finish
Let's Make These Together
- Activate the yeast mixture
- Start by warming your milk to about 110°F – it should feel warm but not hot to the touch. Combine it with sugar and yeast in your mixing bowl, give it a gentle stir, and wait patiently for those bubbles to appear. This step is where the magic begins, so don't rush it. Those bubbles tell you the yeast is alive and ready to create beautiful, fluffy rolls.
- Build your dough
- Once your yeast is foamy and active, add in your melted butter, egg, and salt. Then gradually incorporate the flour, mixing as you go. You'll know you've added enough flour when the dough pulls away from the sides of the bowl but still feels soft. Turn it out onto a floured surface and knead with the heels of your hands, folding and pushing for several minutes until it becomes smooth and elastic.
- Let it rise and shape
- Place your dough in a greased bowl, cover it with a towel, and let it rest in a warm spot. After about an hour, it should double in size. Punch it down gently, divide it into 12 equal pieces, and roll each one into a smooth ball. Arrange them in your baking dish with a little space between each – they'll grow and touch as they rise again.
- Bake and finish with garlic butter
- After the second rise, your rolls are ready for the oven. Bake them until they're golden brown and your kitchen smells incredible. While they bake, prepare your garlic butter by melting butter with minced garlic and fresh parsley. The moment those rolls come out of the oven, brush them generously with that aromatic garlic butter and watch the magic happen.
 pin it
Switch Things Up
I'll never forget the first time I made these rolls for Sunday dinner. I was nervous because homemade bread always seemed intimidating, but these turned out perfect on my first try. The dough was so easy to work with, and watching them rise and turn golden in the oven was so satisfying. When I brushed on that garlic butter and saw them glisten, I knew I had a winner. My family devoured them before the main course even hit the table! Now they request these rolls for every gathering. I've made them for Thanksgiving, Christmas, potlucks, and random Tuesdays when I just want something comforting. The best part? I always make extra to freeze because having homemade rolls ready to reheat is a game-changer.
Perfect Pairings
These garlic butter rolls pair beautifully with so many dishes! Serve them alongside a hearty beef stew or chicken soup – they're perfect for soaking up every last drop. They're also amazing with pasta dishes like spaghetti carbonara or lasagna. For a lighter option, pair them with a fresh Caesar salad or roasted vegetable medley. They work wonderfully at brunch too, alongside scrambled eggs and bacon. And honestly? They're delicious all on their own with extra butter. You really can't go wrong!
 pin it
Frequently Asked Questions
- → Can I make these rolls ahead of time?
Absolutely! You can prepare the dough through the first rise, then cover and refrigerate overnight. The next day, bring it to room temperature, shape the rolls, let them rise again, and bake as directed. You can also freeze baked rolls for up to 3 months.
- → Why didn't my rolls rise properly?
The most common culprit is yeast that's expired or water that was too hot or too cold. Make sure your milk is between 105-115°F and always check the expiration date on your yeast packet. Also ensure your rising environment is warm and draft-free.
- → Can I use instant yeast instead of active dry?
Yes! Instant yeast can be mixed directly into the flour without activating it first. Use the same amount and skip the initial yeast-activating step. Your rise times may be slightly shorter with instant yeast.
- → How do I store leftover rolls?
Store cooled rolls in an airtight container at room temperature for up to 3 days. To refresh them, wrap in foil and warm in a 350°F oven for 5-7 minutes. For longer storage, freeze individually wrapped rolls for up to 3 months.
- → Can I add cheese to these rolls?
Definitely! You can knead shredded cheese into the dough before the first rise, or place a cube of cheese in the center of each roll when shaping. Cheddar, mozzarella, or parmesan all work beautifully with the garlic butter.
- → What if I don't have a warm place for rising?
Turn your oven to the lowest setting for just 1-2 minutes, then turn it off. Place your covered dough inside – the residual warmth creates a perfect rising environment. You can also place the bowl near (not on) a warm stovetop.
Conclusion
These garlic butter dinner rolls are everything you want in a homemade bread: soft, fluffy, buttery, and packed with flavor. They're perfect alongside soup, pasta, or any dinner you can imagine. The garlic herb butter takes them over the top, creating that restaurant-quality finish right in your own kitchen. Whether you're hosting a holiday dinner or just want to elevate a weeknight meal, these rolls deliver every single time. Make a double batch – they disappear fast!