
 pin it
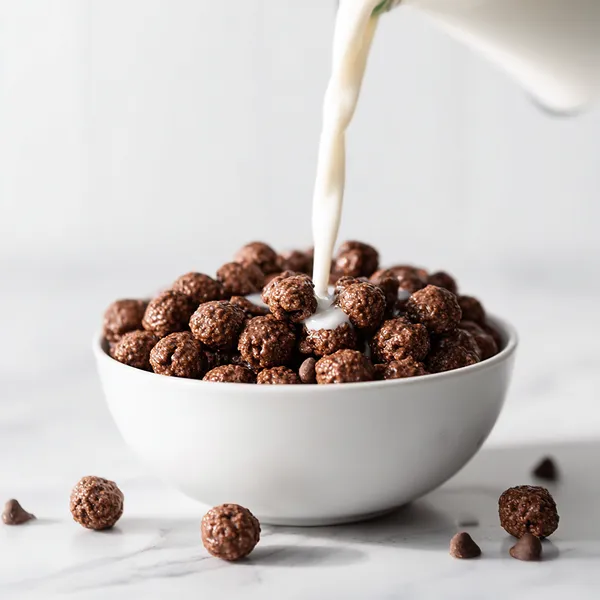
I'll never forget the first time I discovered that you could actually make your own cereal at home. I was skeptical – how could homemade cereal possibly compete with the perfectly engineered crunch of store-bought brands? But when I pulled that first batch of chocolate puffs out of the oven, golden and fragrant, I was instantly converted. This recipe uses simple ingredients that you probably already have in your pantry: oats, cocoa powder, a touch of honey for natural sweetness, and chocolate chips for extra richness. The magic happens when you blend the oats into a fine flour, mix everything together into a thick dough, and then shape them into little balls that puff up beautifully in the oven. What I love most is how customizable they are – you can adjust the sweetness, make them darker or lighter with more or less cocoa, or even add a hint of vanilla or cinnamon. The texture is incredible: crispy on the outside with just enough structure to hold up in milk without getting soggy immediately. Every spoonful delivers that satisfying chocolate flavor without the sugar crash that comes from conventional cereals. Making these has become a meditative process for me, rolling each little ball and watching them transform in the oven.
Why I love this recipe
This recipe holds a special place in my heart because it represents everything I believe in when it comes to cooking: simple, wholesome, and absolutely delicious. I love that I can pronounce every single ingredient and know exactly where it came from. There's something deeply satisfying about creating food from scratch, especially something that we typically just grab off a supermarket shelf without thinking twice. When I make these chocolate puffs, I'm not just preparing breakfast – I'm taking control of what my family eats and ensuring they start their day with real nutrition. The fact that my kids genuinely prefer these over store-bought cereal is the ultimate victory. I love how this recipe proves that healthy food doesn't have to be boring or taste like cardboard. The rich chocolate flavor, the satisfying crunch, the way they stay crispy in milk – it's everything you want in a cereal without any of the guilt. Plus, there's an undeniable joy in watching those little balls of dough transform into perfect puffs in the oven. It's become more than just a recipe; it's a weekly ritual that brings my family together. And knowing that each bowl is packed with fiber, protein, and natural ingredients instead of artificial colors and excessive sugar? That's what makes this recipe truly special to me.
What You Need From Your Kitchen
- Rolled Oats:Blend into a fine flour to create the base of the cereal puffs
- Cocoa Powder:Mix with oat flour for rich chocolate flavor throughout
- Honey or Maple Syrup:Combine with melted chocolate to sweeten and bind the dough
- Chocolate Chips:Melt and mix into the dough for extra chocolaty richness
- Water:Add to achieve the perfect dough consistency for rolling
Let's Make These Together
- Prepare Your Oat Base
- Start by transforming regular rolled oats into a fine flour using your food processor. This creates the perfect foundation for crispy cereal puffs. The finer the flour, the smoother and crunchier your final product will be. Take your time with this step – it makes all the difference.
- Build the Chocolate Mixture
- Melt your chocolate chips gently, stirring frequently to avoid burning. Once silky smooth, incorporate the honey and water to create a binding mixture that will hold everything together. This sweet, chocolaty base is what gives the puffs their irresistible flavor.
- Combine and Create Dough
- Mix your dry ingredients with the chocolate mixture, stirring until you achieve a thick, moldable dough. The consistency should be similar to cookie dough – not too wet, not too crumbly. This is where the magic starts to happen as the ingredients come together.
- Shape Your Puffs
- Roll the dough into tiny balls, keeping them uniform in size for even baking. This might seem tedious, but it's actually quite meditative, and the results are worth every minute. Plus, you can get the whole family involved in this fun step.
- Bake and Cool
- Watch as your little dough balls transform in the oven, firming up and developing that perfect crispy exterior. The cooling process is crucial – resist the temptation to taste them right away. Once completely cool, they'll have that satisfying crunch that makes them perfect for cereal.
 pin it
Switch Things Up
I first made these chocolate cereal puffs on a rainy Sunday morning when I was craving something sweet but didn't want to feel guilty about it. I had a bag of oats sitting in my pantry and remembered seeing a recipe for homemade cereal somewhere online. I thought, why not give it a shot? The first batch came out a little too soft because I didn't bake them long enough, but the second attempt was pure magic. My kids came running into the kitchen asking what smelled so amazing, and when they tried them, their eyes lit up like it was Christmas morning. Now we make a double batch every week and store them in an airtight container. They've become our Sunday morning tradition, and honestly, I think these taste way better than anything you can buy at the store. The best part is knowing exactly what's going into our breakfast bowls – no mysterious ingredients or artificial flavors.
Perfect Pairings
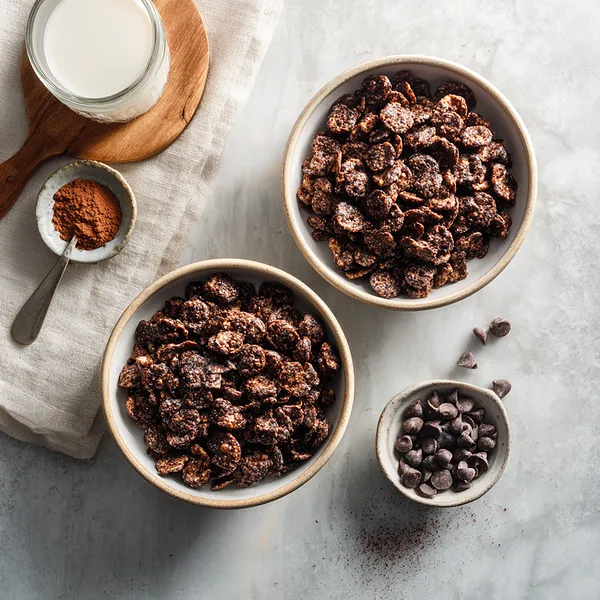
These Chocolate Cocoa Puffs pair wonderfully with cold whole milk, almond milk, or oat milk for a classic cereal experience. For an extra indulgent breakfast, serve them alongside fresh sliced bananas or strawberries. They also make an excellent crunchy topping for yogurt parfaits or smoothie bowls. Try sprinkling them over vanilla ice cream for a guilt-free dessert option. For a protein boost, enjoy them with a glass of chocolate milk or a protein shake. They even work as a standalone snack straight from the container when you need a quick energy boost during the day.
 pin it
Frequently Asked Questions
- → Can I make these cereal puffs gluten-free?
Yes! Simply use certified gluten-free oats. Regular oats are often processed in facilities that also handle wheat, so make sure to look for the gluten-free label if you have celiac disease or gluten sensitivity.
- → How long do these homemade cocoa puffs stay fresh?
When stored in an airtight container at room temperature, these puffs stay crispy and delicious for up to 2 weeks. You can also freeze them for up to 3 months – just let them come to room temperature before serving.
- → Can I use quick oats instead of rolled oats?
It's best to stick with rolled oats (old-fashioned oats) as they create a better texture when ground into flour. Quick oats are too processed and may result in a mushy consistency rather than crispy puffs.
- → My puffs turned out soft instead of crunchy. What went wrong?
This usually happens if the puffs didn't bake long enough or weren't allowed to cool completely. Make sure to bake them until they're firm to the touch, and always let them cool entirely on the baking sheet. They crisp up significantly as they cool.
- → Can I reduce the sugar in this recipe?
You can reduce the honey or maple syrup slightly, but keep in mind that it serves both as a sweetener and a binding agent. If you reduce it too much, the puffs may not hold together well. Start by reducing by 1 tablespoon and see how it works.
- → Are these healthier than store-bought chocolate cereal?
Absolutely! These homemade puffs contain whole grain oats, natural sweeteners, and real cocoa without artificial flavors, colors, or preservatives. They have more fiber and protein than most commercial chocolate cereals and significantly less refined sugar.
Conclusion
This Healthy Homemade Chocolate Cereal is a game-changer for breakfast time. With just four main ingredients and minimal effort, you can create a nutritious, delicious alternative to store-bought sugary cereals. The combination of wholesome oats and rich cocoa powder delivers both nutrition and indulgence. These crispy puffs stay crunchy in milk and provide sustained energy throughout your morning. Whether you're making them for your kids or treating yourself, this recipe proves that healthy eating doesn't mean sacrificing flavor or fun.