
 pin it
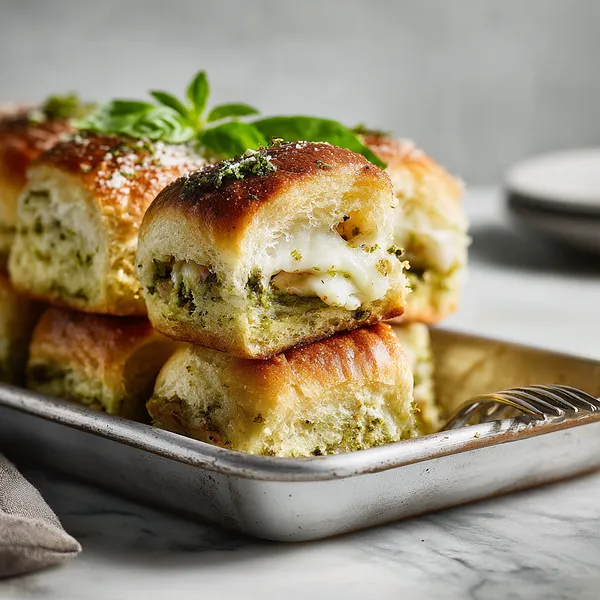
I'll never forget the first time I encountered pesto chicken sliders at a friend's Italian-themed dinner party years ago. I was immediately struck by how something so simple could be so incredibly flavorful. The host had made them almost as an afterthought, yet they became the star of the evening. Everyone kept going back for more, and I left that night determined to recreate them. My version builds on that original inspiration but adds a few tweaks I've learned along the way. The key is using quality pesto - whether homemade or a good store-bought brand - because it really is the soul of this dish. I also discovered that slightly toasting the buns before assembly gives them structure and prevents sogginess. The roasted red peppers weren't in the original recipe I tried, but I added them one day on a whim and now I can't imagine these sliders without that sweet, smoky element. What makes this recipe special is how it transforms everyday ingredients into something that feels restaurant-quality. The chicken stays moist and tender, the pesto adds that fresh herby punch, and the cheese binds everything together in melty, stringy perfection.
Why I love this recipe
There are so many reasons why these sliders have become one of my go-to recipes. First, they're incredibly forgiving - you can adjust quantities, swap ingredients, and they still turn out amazing. Second, they're perfect for any occasion, from casual weeknight dinners to impressive party appetizers. I love how they can be mostly assembled ahead of time and then just popped in the oven when you're ready. The baking method ensures everything gets heated through evenly and the cheese gets perfectly melty without any effort. But beyond the practical aspects, these sliders just make people happy. There's something about pulling apart a warm, cheesy slider that brings out smiles. The combination of flavors is both familiar and exciting - everyone knows chicken and cheese, but the pesto elevates it to something special. I also appreciate how customizable they are for different dietary needs - you can use gluten-free buns, dairy-free cheese, or add extra vegetables. Every time I make these, I'm reminded that the best recipes aren't always the most complicated ones - sometimes it's about taking good ingredients and putting them together in just the right way.
What You Need From Your Kitchen
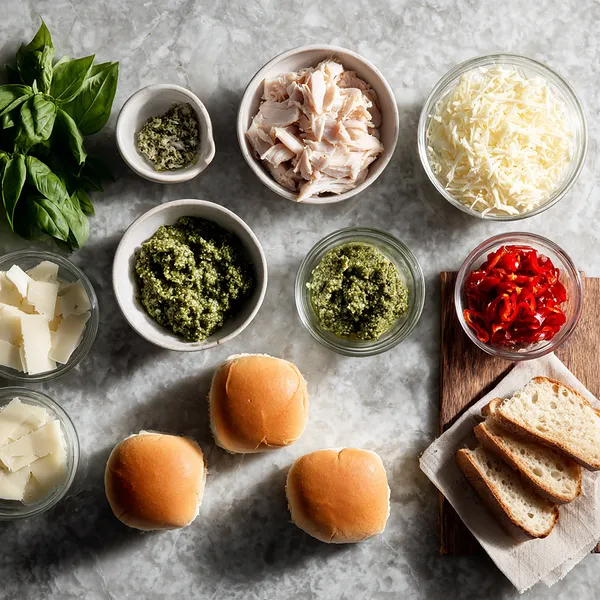
- Slider buns: Use Hawaiian rolls for a slightly sweet flavor, or regular slider buns for a more traditional taste. Keep them connected for easier assembly.
- Cooked chicken breast: Shred into bite-sized pieces and mix with pesto for maximum flavor absorption. Rotisserie chicken is a great time-saver.
- Basil pesto sauce: This is the star ingredient - use quality store-bought or homemade pesto. Reserve some for layering throughout the sliders.
- Mozzarella cheese: Shredded mozzarella melts beautifully and creates that stretchy, cheesy texture. Low-moisture mozzarella works best.
- Roasted red peppers: Adds sweetness and color. You can use jarred roasted peppers or roast your own bell peppers.
- Garlic butter: Mix melted butter with minced garlic to brush on top of the buns for golden, flavorful crust.
Let's Make These Together
- Prep Your Workspace
- Start by gathering all your ingredients and equipment. Preheat your oven to 375°F so it's ready when you need it. Grease your baking dish and set it aside. If you're using raw chicken breasts, cook them first by baking, grilling, or poaching, then let them cool slightly before shredding. Having everything prepared and within reach makes the assembly process smooth and enjoyable.
- Season the Chicken
- In a medium bowl, combine your shredded chicken with about half of the pesto sauce. Mix thoroughly so every piece of chicken gets coated with that vibrant green pesto goodness. Season with salt and freshly ground black pepper to taste. The pesto already contains salt from the parmesan, so taste as you go. This step ensures your chicken is flavorful throughout rather than relying solely on the pesto layers.
- Build Your Slider Base
- Slice your connected slider buns horizontally - imagine you're opening a book, keeping all the buns attached. Place the bottom half in your greased baking dish. Spread a thin layer of pesto directly on these bottom buns. This creates a moisture barrier and adds an extra punch of flavor. Don't skip this step - it prevents soggy bottoms and ensures every bite is packed with pesto perfection.
- Layer with Love
- Now comes the fun part - building your layers! Spread the pesto-chicken mixture evenly across all the bottom buns. Next, distribute your sliced roasted red peppers over the chicken, making sure each slider will get some of that sweet, smoky flavor. Finally, shower everything with shredded mozzarella cheese, being generous but not overwhelming. Drizzle any remaining pesto over the cheese layer for good measure.
- Seal and Butter
- Carefully place the top half of the buns over your beautiful layers. In a small bowl, mix your melted butter with minced garlic - this is your secret weapon for golden, aromatic tops. Use a pastry brush or spoon to generously brush this garlic butter all over the top of the buns. Make sure you cover every inch for even browning and maximum flavor.
- Bake to Perfection
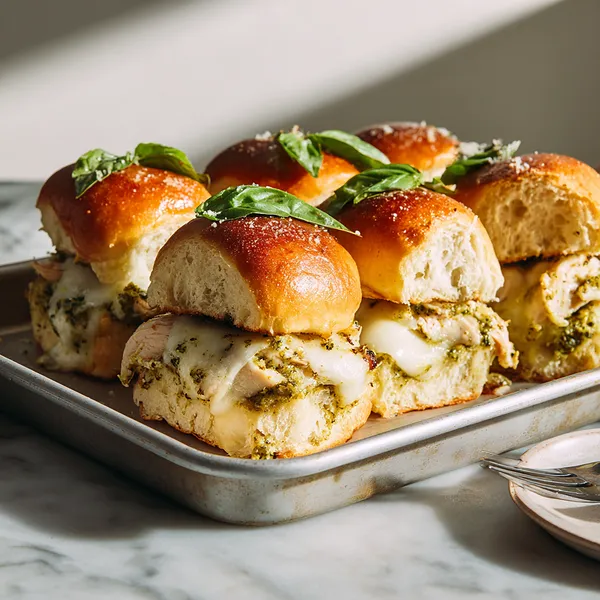
- Cover your baking dish tightly with aluminum foil. This trapped steam will heat everything through and melt the cheese while keeping the buns from over-browning too quickly. Bake covered for 15 minutes, then dramatically remove the foil and bake for another 8-10 minutes until the tops are gorgeously golden and the cheese is bubbling. Your kitchen will smell absolutely amazing. Let them rest for a few minutes before slicing and serving - this helps everything set and prevents burning your mouth on molten cheese!
 pin it
Switch Things Up
I first made these sliders for a last-minute gathering when I had leftover rotisserie chicken and a jar of homemade pesto in the fridge. I was skeptical about how they'd turn out, honestly - could something this simple really be special? But when I pulled them from the oven and saw that golden, cheese-bubbling perfection, I knew I'd stumbled onto something good. My friends devoured them in minutes, with everyone asking for the recipe. Since then, I've played around with different variations - sometimes adding sun-dried tomatoes, other times using different cheeses like provolone or fontina. I've made them for potlucks, holiday parties, and even packed them for picnics. The best part? They're one of those recipes that looks way more complicated than it actually is. People always think I spent hours in the kitchen, but really, it's just smart layering and letting the oven do the work.
Perfect Pairings
These chicken pesto sliders pair beautifully with so many sides! For a lighter meal, serve them alongside a crisp Caesar salad or a simple arugula salad with lemon vinaigrette. If you're going for comfort food vibes, sweet potato fries or garlic parmesan fries are absolute winners. A creamy tomato soup also makes a fantastic companion, especially on cooler days. For drinks, try a crisp white wine like Pinot Grigio or Sauvignon Blanc, or keep it casual with sparkling lemonade or iced tea. If you're serving these at a party, set out some marinara sauce or extra pesto for dipping - it takes them to the next level!
 pin it
Frequently Asked Questions
- → Can I make these sliders ahead of time?
Absolutely! You can assemble these sliders completely, cover them tightly with plastic wrap or foil, and refrigerate for up to 24 hours before baking. When you're ready to bake, add about 5-10 minutes to the covered baking time since they'll be starting from cold. This makes them perfect for entertaining or meal prep.
- → What can I substitute for the pesto?
If you don't have pesto or want to try something different, you can use sun-dried tomato spread, olive tapenade, or even a mixture of garlic butter and Italian herbs. For a creamy option, try mixing mayonnaise with fresh basil and garlic. Each variation will give you a different but delicious flavor profile.
- → Can I freeze these sliders?
Yes! You can freeze assembled but unbaked sliders for up to 2 months. Wrap them tightly in plastic wrap and then in foil. To bake from frozen, add about 10-15 minutes to the covered baking time. You can also freeze leftover baked sliders, though the texture of the bread won't be quite as crispy when reheated.
- → How do I prevent the bottoms from getting soggy?
The key is that thin layer of pesto spread directly on the bottom buns before adding the chicken. This creates a protective barrier. Also, make sure your chicken isn't too wet - drain any excess liquid before mixing it with pesto. Using low-moisture mozzarella instead of fresh mozzarella also helps prevent excess moisture.
- → What other cheeses work well in this recipe?
While mozzarella is classic for its meltability, you can experiment with provolone for a sharper flavor, fontina for extra creaminess, or a combination of mozzarella and parmesan for added depth. Gouda also melts beautifully and adds a slightly sweet, smoky note that complements the pesto wonderfully.
- → Can I make these gluten-free?
Yes! Simply substitute gluten-free slider buns or dinner rolls for the regular buns. Everything else in the recipe is naturally gluten-free, though always check your pesto label to ensure it doesn't contain any hidden gluten ingredients. The texture and flavor will be just as delicious.
- → How do I store and reheat leftovers?
Store leftover sliders in an airtight container in the refrigerator for up to 3 days. To reheat, place them on a baking sheet in a 350°F oven for about 10 minutes until warmed through and the cheese is melty again. You can also microwave them, but the bread won't be as crispy. For best results, wrap them loosely in foil before reheating in the oven.
Conclusion
These Baked Chicken Pesto Sliders are the perfect solution when you need something impressive but incredibly easy to pull together. The combination of tender chicken, aromatic pesto, and melted cheese creates layers of flavor that everyone loves. They're ideal for feeding a crowd, meal prepping for the week, or simply enjoying as a satisfying dinner. The beauty of this recipe lies in its versatility - you can easily customize the ingredients based on what you have on hand or your family's preferences. Once you master this basic technique, you'll find yourself coming back to it again and again.